You must add this DNS glue record to use you nameservers.
- Log into WHM.
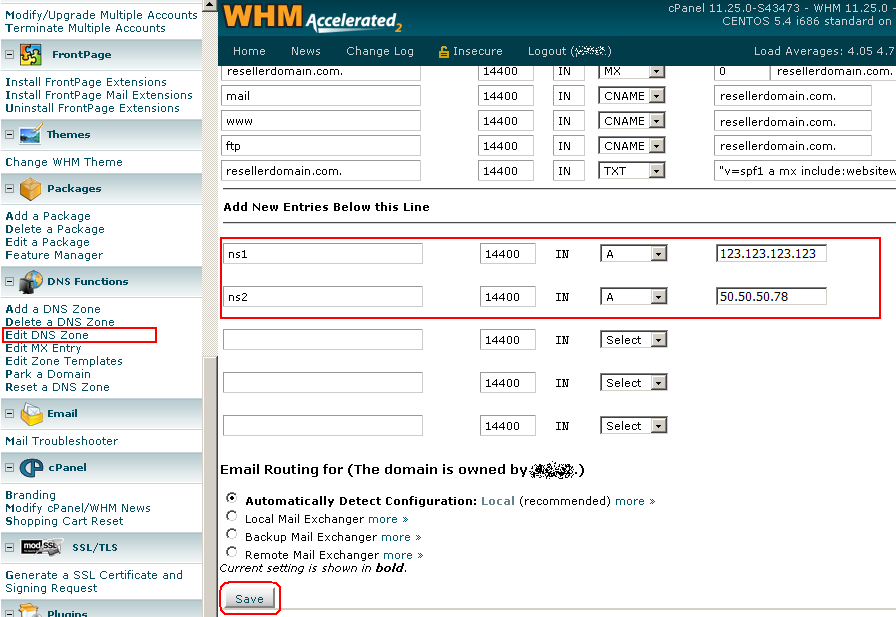
- Navigate to the DNS Functions section.
- Click on the Edit DNS Zone option.
- Select the domain that you need to add the Records to.
- Click the Edit button and wait for the page to load.
- In the first blank, type ns1.
- Skip the box with 14400, and go to the drop-down box.
- In the drop-down box, select A. A new box will appear.
- Erase the IP or hostname within the box.
- Type in the IP address for the NS1 private nameserver.
- In the second blank, type ns2.
- Skip the box with 14400, and go to the drop-down box.
- In the drop-down box, select A. A new box will appear.
- Erase the IP or hostname within the box.
- Type in the IP address for the NS2 private nameserver.
- Scroll all the way down to the bottom of the page and click the Save button.
When you get to the last step, your A record entries should look similar to the following: