If you emails are not arriving or you are getting delays or no receipt, here are ways to help improve email delivery.
To keep important email messages out of your Gmail spam folder, you should do the following steps.
- Add the sender email address to your Google Contacts. When you add a sender’s email address to your contacts, it tells Google you want to receive email from that sender. This method does not guarantee messages from the desired sender won’t be sent to spam, but it’s an easy way to make it more likely the desired email will arrive in your inbox.
- Create a filter rule to prevent messages from specific senders going into the spam folder. This adding to the whitelist or safe sender list. Also, If an email message is already in your spam folder, you can use an option to train the Gmail spam filter to not send those messages to your spam folder.
Add a Gmail Contact on the Computer and on Android or IOS App.
On your computer, go to contacts.google.com, at the top left corner, select Create contact, enter the contact’s information, including the sender email address, select save in the bottom right corner.
On your Android phone or tablet, open the Contacts app, at the bottom right, tap add, enter the contact’s name and email address. Make sure you save the contact to the correct account. Next to your email account, tap the Down arrow and then select the account that will receive the email messages you’re whitelisting. When you’re finished, tap Save.
Create a filter rule to keep desired email out of spam
Gmail’s filters provide a lot of useful ways to manage your email and one of those ways is to set a rule to prevent email from a specific email address from going to your spam folder. Filters are the closest thing Gmail has to a “safe sender” or “whitelist”.
Filters can only be created and modified from the online web version of Gmail, so you’ll need to go to your computer to complete the following.
Open the Gmail website from your computer. In the search box at the top, select the Down arrow.
In the From field, enter the sender email address. At the bottom of the search window, click Create filter.
Select Never send it to Spam. Click Create filter.
Mark an email as Not Spam
On your computer, open the Gmail website and on the left, select More then find Spam.
Open the desired email message. At the top of the page, select “Not spam”. The message will be moved to your inbox.
If you’re an email sender having trouble sending email to Gmail recipients, visit the Gmail Postmaster Tools website. Source: https://www.whitelist.guide/gmail/
Outlook, Office365
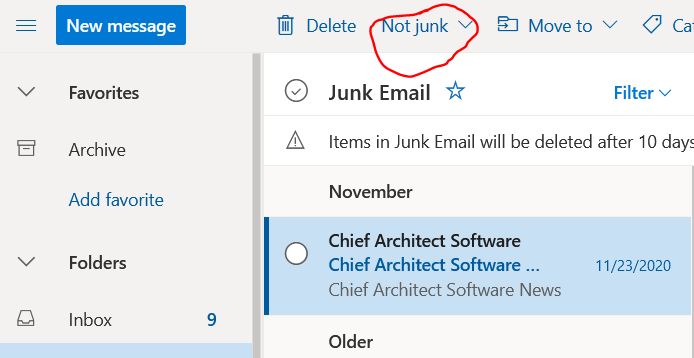
Add an address to your Contacts and the Safe Senders list to ensure you’ll always receive their messages. Email addresses in the Safe Senders List are never treated as junk email. If lands in your junk email folder, you can mark it as “not junk” to teach Outlook that you want to receive that type of email.
Safe Senders list
By default, email addresses in your Outlook contacts are considered safe senders by the Junk Email Filter, but you can change this setting. Email messages from safe senders are never moved to the Junk E-mail folder.
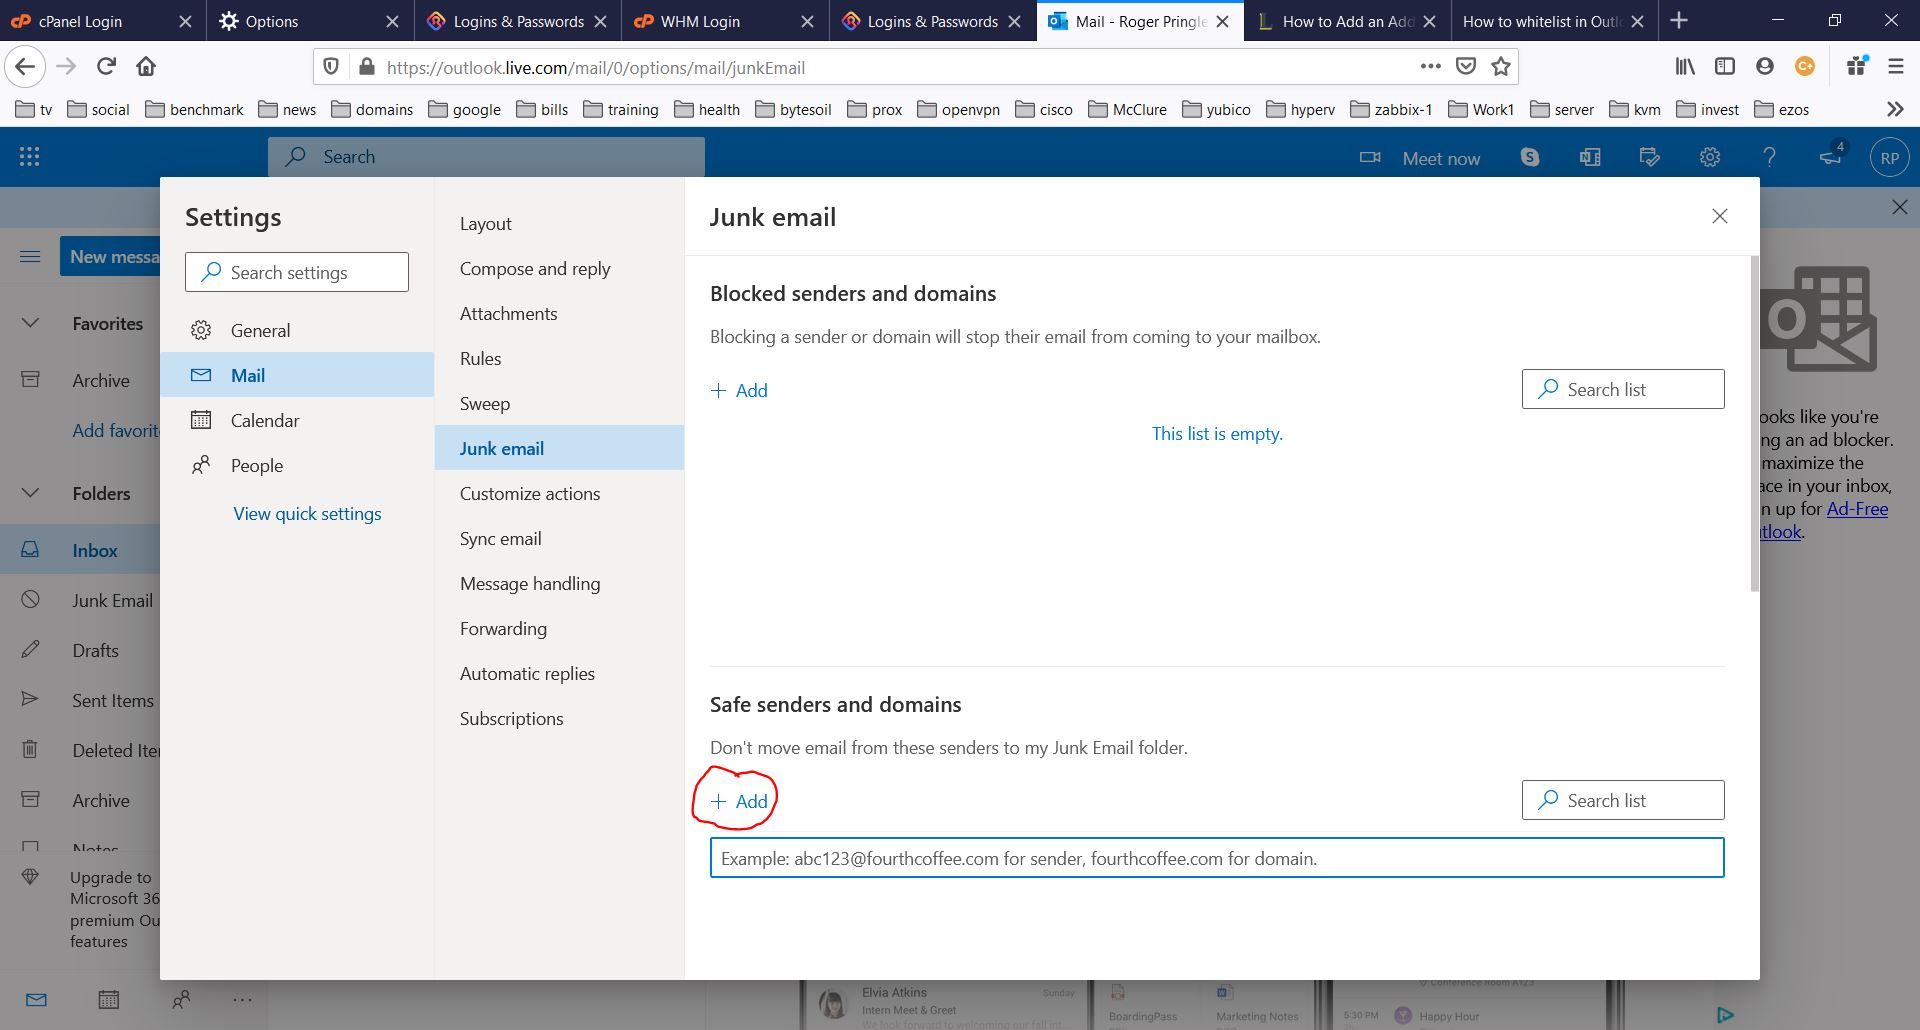
To add people to your Safe Senders List (web), do the following:
Select the Settings icon (gear icon), select View all Outlook settings,
Select Mail, Select Junk email, Enter the sender email address, Hit Enter on Keyboard > Save.
Check blocked senders and safe senders list
Select Settings > View all Outlook settings, Select Mail, and then select Junk email, If you see the sender’s address listed under “Blocked senders and domains”, select the address and then select Remove > Save.
Mark a message as “not junk”. In your Outlook.com folder list, select the Junk Email folder and look for the missing email. Right-click the desired email and then select Mark as not junk. The message will automatically be moved to your inbox.
Other resources:
https://www.lifewire.com/add-address-domain-safe-senders-outlook-1173760
whitelist.guide


