This article describes how to host a web site on IPFS.
Requirements:
Access to a Registered Domain and DNS records.
Edit your DNS to point the A record to the IPFS server. We will need this to resolve in order to install a Let’s Encrypt Certificate.
Lets Start with an Update
# sudo apt update
# sudo apt upgrade -y
Lets create a new user account to run IPFS and switch to it:
# adduser ipfs
Install sudo
# apt install sudo
Edit sudo and add the ipfs user
# visudo
Add the IPFS user below root
# User privilege specification
root    ALL=(ALL:ALL) ALL
ipfs    ALL=(ALL:ALL) ALL
change to the IPFS user.
# su ipfs
Install IPFS
Get the latest release at https://dist.ipfs.tech/#kubo
$ wget https://dist.ipfs.tech/kubo/v0.16.0/kubo_v0.16.0_linux-amd64.tar.gz
$ tar xfv kubo_v0.16.0_linux-amd64.tar.gz
$ cd kubo
./install.sh
Initialize IPFS:
$ ipfs init --profile=server
Switch to the root user:
$ exit
Allow the ipfs user to run long-running services by enabling user lingering for that user:
# loginctl enable-linger ipfs
Create the file /etc/systemd/system/ipfs.service with this content:
# nano /etc/systemd/system/ipfs.service
[Unit]
Description=IPFS Daemon
After=syslog.target network.target remote-fs.target nss-lookup.target
[Service]
Type=simple
ExecStart=/usr/local/bin/ipfs daemon --enable-namesys-pubsub
User=ipfs
[Install]
WantedBy=multi-user.target
Enable and start the service:
# systemctl enable ipfs
# systemctl start ipfs
IPFS should be up and running, and start when the server boots.
Check IPFS
$ su ipfs
$ ipfs swarm peers
Add Website Files
Create a folderfor your website files. Add this folder in the ipfs/home directory
$ cd ~
$ mkdir mysitefiles
Upload the site files to the directory. Now we can add these to IPFS with the following contect
$ ipfs add -r <path>
This adds all contents of the folder at to IPFS, recursively. You should see output similar to this:
$ ipfs add -r mysitefiles
Output:
 ipfs add -r mysitefiles/
added QmZrSe9TABdSsWL38FJTp4fW7TposFuzRLSBRYAEMVt1RE mysitefiles/about.html
added Qmdf1mYmCjivJWcXpGikf87PV5VkBo6DQugsjq6GdNZ1az mysitefiles/index.html
added QmW8U3NEHx3p73Nj9645sGnGa8XzR43rQh3Kd52UKncWMo mysitefiles/moon-logo.png
added QmQ91HDqAt1eE7X4DHuJ9r74U3KgKN3pDGidLM6sadK2q2 mysitefiles
 12.66 KiB / 12.66 KiB [==================================================================================================] 100.00%
Each of the long sequence of numbers is called a Content Identifier or CID. These are cryptographically hashed. We can now check to see if the site loads. You can check and use an active gateway here: https://ipfs.github.io/public-gateway-checker/
Add the main Content Identifier (CID) folder ID to the URL. How to link to content on IPFS.
https://ipfs.io/ipfs/<CID>
# e.g
https://ipfs.io/ipfs/QmQ91HDqAt1eE7X4DHuJ9r74U3KgKN3pDGidLM6sadK2q2
Now we can set up the DNS records. See: https://dnslink.io/#introduction
Login to manage your DNS. Add the following TXT Record:
dnslink=/ipfs/QmQ91HDqAt1eE7X4DHuJ9r74U3KgKN3pDGidLM6sadK2q2
Install nginx with Let’s Encrypt SSL certs
Change to root
$ su root
# apt-get update
# apt-get install nginx
Check status to make sure it started and is not throwing any errors:
$ systemctl status nginx
Results
● nginx.service - A high performance web server and a reverse proxy server
   Loaded: loaded (/lib/systemd/system/nginx.service; enabled; vendor preset: en
   Active: active (running) since Wed 2021-06-16 22:59:51 UTC; 1min 44s ago
     Docs: man:nginx(8)
  Process: 13062 ExecStartPre=/usr/sbin/nginx -t -q -g daemon on; master_process
  Process: 13063 ExecStart=/usr/sbin/nginx -g daemon on; master_process on; (cod
 Main PID: 13064 (nginx)
    Tasks: 2 (limit: 1163)
   Memory: 5.3M
   CGroup: /system.slice/nginx.service
           ├─13064 nginx: master process /usr/sbin/nginx -g daemon on; master_pr
           └─13065 nginx: worker process

Jun 16 22:59:51 ip-10-0-1-209 systemd[1]: Starting A high performance web server
Jun 16 22:59:51 ip-10-0-1-209 systemd[1]: nginx.service: Failed to parse PID fro
Jun 16 22:59:51 ip-10-0-1-209 systemd[1]: Started A high performance web server
lines 1-16/16 (END)
Get your IP and open it with browser to make sure Nginx is serving its default page:
$ curl -s domain.com
$ curl -s Ip_address
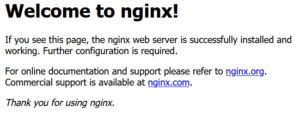
Now browse to http://your-ip-here and you should see the Nginx default page “Welcome to Nginx”.
Set Up your nginx configs:
$ sudo mv /etc/nginx/sites-available/default /etc/nginx/sites-available/default_back
# sudo nano /etc/nginx/sites-available/default
Copy and paste this config (change example.com to your domain)
server {
    server_name example.com www.example.com;
    server_tokens off;

    listen 80;
    listen [::]:80;
    listen 443 ssl;
    listen [::]:443 ssl;

    location / {
        proxy_pass http://localhost:8080;
        proxy_http_version 1.1;
        proxy_set_header Upgrade $http_upgrade;
        proxy_set_header Connection 'upgrade';
        proxy_set_header Host $host;
        proxy_cache_bypass $http_upgrade;
    }
}
Test that new config syntax and make sure it is ok:
$ sudo nginx -t
If all good reload:
$ sudo systemctl reload nginx
Add Lets Encrypt according to this article – https://www.geekdecoder.com/set-up-lets-encrypt-on-debian-10/
The final config should resemble this:
server {
    server_name example.com www.example.com;
    server_tokens off;

    location / {
        proxy_pass http://localhost:8080;
        proxy_http_version 1.1;
        proxy_set_header Upgrade $http_upgrade;
        proxy_set_header Connection 'upgrade';
        proxy_set_header Host $host;
        proxy_cache_bypass $http_upgrade;
    }

    listen [::]:443 ssl ipv6only=on; # managed by Certbot
    listen 443 ssl; # managed by Certbot
    ssl_certificate /etc/letsencrypt/live/example.com/fullchain.pem; # managed by Certbot
    ssl_certificate_key /etc/letsencrypt/live/example.com/privkey.pem; # managed by Certbot
    include /etc/letsencrypt/options-ssl-nginx.conf; # managed by Certbot
    ssl_dhparam /etc/letsencrypt/ssl-dhparams.pem; # managed by Certbot

}
server {
    if ($host = www.example.com) {
        return 301 https://$host$request_uri;
    } # managed by Certbot


    if ($host = example.com) {
        return 301 https://$host$request_uri;
    } # managed by Certbot


    server_name example.com www.example.com;

    listen 80;
    listen [::]:80;
    return 404; # managed by Certbot
}
The site should now be available.
