This article describes How to install LAMP (Linux, Apache, MySql-Maria, PHP) on Debian 11. The first step is to install a Devian server.
Once Debian 11 is installed, let’s follow and install the rest with the apt meta-packager..
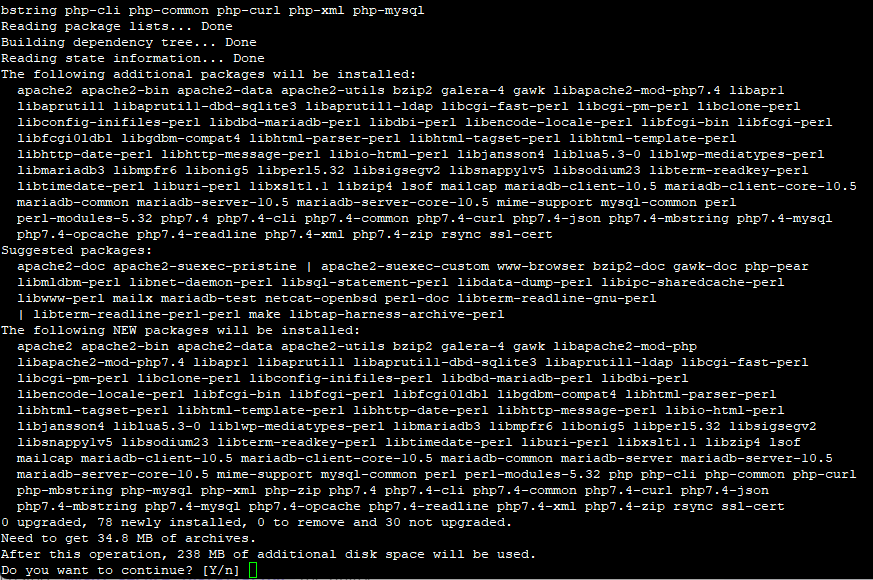
$ sudo apt install mariadb-server php libapache2-mod-php php-zip php-mbstring php-cli php-common php-curl php-xml php-mysql
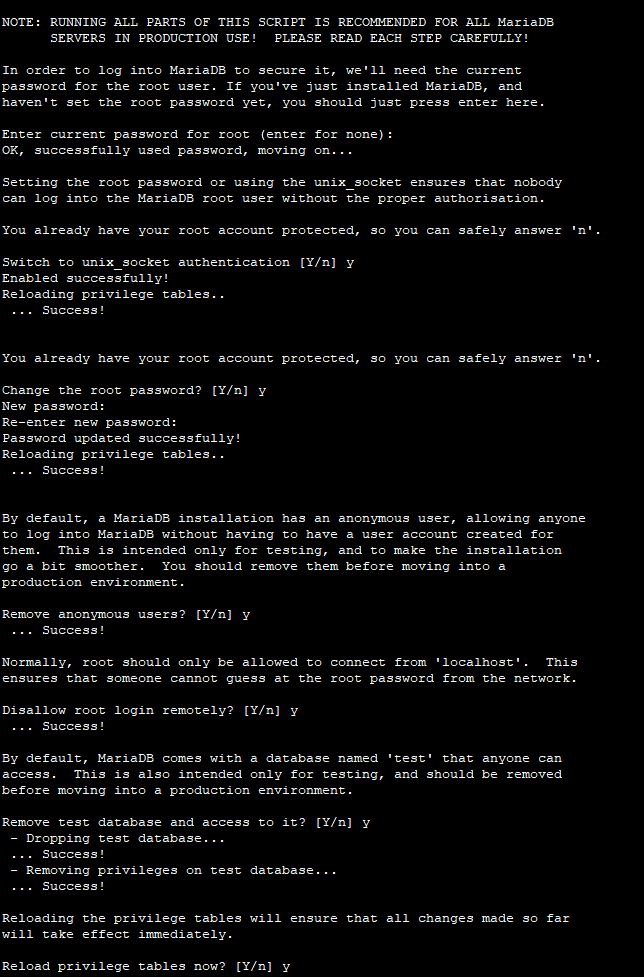
After MySQL and PHP installation finishes, it is often recommended to secure MySQL installation using mysql_secure_installation the utility.
$ sudo mysql_secure_installation
Now lets change some PHP settings.
$ sudo nano /etc/php/7.4/apache2/php.ini
Install Apache
$ sudo apt install apache2
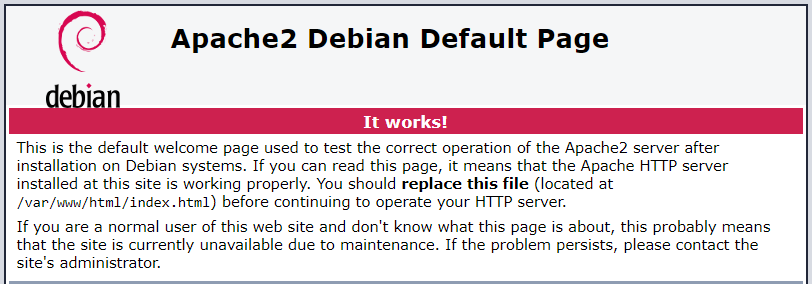
Once installed, the Apache webserver will be up and serving a default web page. There are several ways to confirm that the Apache webserver is up and running. The easiest option is to use the lsof utility:
$ sudo lsof -i :80
Also, curl.
$ curl 192.168.0.33 | grep Apache
The other option is to simply navigate to the IP address of the webserver.
Now we have utilities for managing both sites and modules in Apache.
-a2ensite: This utility is used to enable a website after the configuration file has been created.
-a2dissite: This utility is used to disable a website by specifying the website’s configuration file.
-a2enmod: This utility is used to enable extra Apache2 modules.
-a2dismod: This utility is used to disable extra Apache2 modules.
-a2query: This utility can be used to gather information about sites currently enabled.
Let’s use these to install Apache modules.
Note: This is important if installing ssl certs at a later date. See: Set Up Let’s Encrypt On Debian 11 With Apache Server
You can check the apache modules available at /etc/apache2/mods-available:
$ sudo ls -la /etc/apache2/mods-available
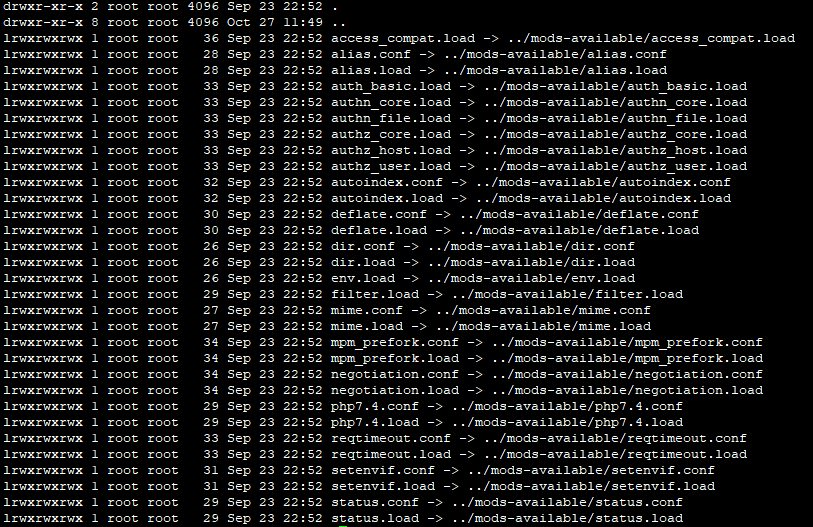
These are modules that are available for apache. Not all are activated. To see that active modules. Check ls -la /etc/apache2/mods-enabled/
$ sudo ls -la /etc/apache2/mods-enabled/
As we can see...the ssl module is not avaiable! Let's enable it with a2enmod!
$ sudo a2enmod ssl
Output:
Considering dependency setenvif for ssl:
Module setenvif already enabled
Considering dependency mime for ssl:
Module mime already enabled
Considering dependency socache_shmcb for ssl:
Enabling module socache_shmcb.
Enabling module ssl.
See /usr/share/doc/apache2/README.Debian.gz on how to configure SSL and create self-signed certificates.
To activate the new configuration, you need to run:
  systemctl restart apache2
Let’s restart
$ sudo systemctl restart apache2
Now, we can see the modules enabled.
$ sudo ls -la /etc/apache2/mods-enabled/ | grep ssl
lrwxrwxrwx 1 root root   26 Oct 27 12:07 ssl.conf -> ../mods-available/ssl.conf
lrwxrwxrwx 1 root root   26 Oct 27 12:07 ssl.load -> ../mods-available/ssl.load
Lets see if the apache ssl server is working ok.
$sudo lsof -i :443
Output:
COMMAND  PID     USER   FD   TYPE DEVICE SIZE/OFF NODE NAME
apache2 7994     root    6u  IPv6  39751      0t0  TCP *:https (LISTEN)
apache2 7995 www-data    6u  IPv6  39751      0t0  TCP *:https (LISTEN)
apache2 7996 www-data    6u  IPv6  39751      0t0  TCP *:https (LISTEN)
apache2 7997 www-data    6u  IPv6  39751      0t0  TCP *:https (LISTEN)
apache2 7998 www-data    6u  IPv6  39751      0t0  TCP *:https (LISTEN)
apache2 7999 www-data    6u  IPv6  39751      0t0  TCP *:https (LISTEN)
Now, let’s create a site. The first thing to do when setting up a new site is to create a new configuration file in the “sites-available” directory.
$ cd /etc/apache2/sites-available
Checking this folder, we see 2 files:
$ ls -la
total 20
drwxr-xr-x 2 root root 4096 Oct 27 12:48 .
drwxr-xr-x 8 root root 4096 Oct 27 12:48 ..
-rw-r--r-- 1 root root 1332 Jun  9 04:22 000-default.conf
-rw-r--r-- 1 root root 6338 Jun  9 04:26 default-ssl.conf
Note: The 0’s at the front of the file name simply force an order when a directory is scanned and the results are processed one by one. With apache, the first virtual host read/processed is the one clients are sent to if they connect requesting a host name that your server isn’t configured to serve up.
-000-default.conf- normal apache configuration file
-default-ssl.conf-This is the default example configuration of default-ssl.conf provided by Apache
Let’s create a site by copying the 000-default.conf.
$ sudo cp 000-default.conf yourdomain.conf
This will copy the configuration from the default site into the new site configuration file for further modification. Open the new site configuration page with a text editor.
$ sudo nano yourdomain.conf
Let’s modify some of the settings. Change the following to your information:
ServerAdmin webmaster@localhost (where you receive email)
DocumentRoot /var/www/yoursite (where you wnat the files for your website to live)
Save the changes to this file and exit the text editor.
Lets create the file directory from above and change the ownership and permissions.
$ sudo mkdir -p /var/www/yoursite
[code]

Lets create a test file.

[code]
$ sudo nano /var/www/yoursite/index.html
Add the following to it.
<!DOCTYPE html>
<html lang="en" dir="ltr">
  <head>
    <meta charset="utf-8">
    <title>Welcome to yoursite.com</title>
  </head>
  <body>
    <h1>Success! yoursite.com home page!</h1>
  </body>
</html>
Let’s set the ownership and permission to the site directory
$ sudo chown -R www-data:www-data /var/www/yoursite
$ sudo chmod 755 /var/www/yoursite
Now, apache needs to be told to serve this new site.
$ sudo a2ensite yoursite.conf
Output:
Enabling site ipgw.io.
To activate the new configuration, you need to run:
  systemctl reload apache2
Now run:
$ sudo systemctl reload apache2
$ sudo a2query -s yoursite.conf
Output:
...yoursite.com (enabled by site administrator)
Now, we can load the website with the domain name you are hosting.


1 thought on “
How to install LAMP (Linux, Apache, MySql-Maria, PHP) on Debian 11”