SSL certificate info on Chrome you get a message that we are using an obsolete cipher suite TLS 1.0. We need to upgrade to 1.1 or 1.2. How can this be done?

# nano /etc/httpd/conf.d/ssl.conf

Old


# List the enable protocol levels with which clients will be able to
# connect.  Disable SSLv2 access by default:
SSLProtocol all -SSLv2

#   SSL Cipher Suite:
# List the ciphers that the client is permitted to negotiate.
# See the mod_ssl documentation for a complete list.
SSLCipherSuite ALL:!ADH:!EXPORT:!SSLv2:RC4+RSA:+HIGH:+MEDIUM:+LOW

New

##   SSL Protocol support:
## List the enable protocol levels with which clients will be able to
## connect.  Disable SSLv2 access by default:
SSLProtocol All -SSLv2 -SSLv3

SSLCipherSuite EECDH+AESGCM:EDH+AESGCM:AES256+EECDH:AES256+EDH
#
##   SSL Cipher Suite:
## List the ciphers that the client is permitted to negotiate.
## See the mod_ssl documentation for a complete list.
#SSLCipherSuite ALL:!ADH:!EXPORT:!SSLv2:RC4+RSA:+HIGH:+MEDIUM:+LOW

1. Getting the required software

For an SSL encrypted web server you will need a few things. Depending on your install you may or may not have OpenSSL and mod_ssl, Apache’s interface to OpenSSL. Use yum to get them if you need them.


# yum install mod_ssl openssl

Yum will either tell you they are installed or will install them for you.

2. Generate a self-signed certificate

Using OpenSSL we will generate a self-signed certificate. If you are using this on a production server you are probably likely to want a key from a Trusted Certificate Authority, but if you are just using this on a personal site or for testing purposes a self-signed certificate is fine. To create the key you will need to be root so you can either su to root or use sudo in front of the commands

# Generate private key


#openssl genrsa -out ca.key 2048 

# Generate CSR

 
# openssl req -new -key ca.key -out ca.csr

# Generate Self Signed Key


# openssl x509 -req -days 365 -in ca.csr -signkey ca.key -out ca.crt

# Copy the files to the correct locations


cp ca.crt /etc/pki/tls/certs
cp ca.key /etc/pki/tls/private/ca.key
cp ca.csr /etc/pki/tls/private/ca.csr

WARNING: Make sure that you copy the files and do not move them if you use SELinux. Apache will complain about missing certificate files otherwise, as it cannot read them because the certificate files do not have the right SELinux context.
If you have moved the files and not copied them, you can use the following command to correct the SELinux contexts on those files, as the correct context definitions for /etc/pki/* come with the bundled SELinux policy.


restorecon -RvF /etc/pki

Then we need to update the Apache SSL configuration file


Nano /etc/httpd/conf.d/ssl.conf

Change the paths to match where the Key file is stored. If you’ve used the method above it will be


SSLCertificateFile /etc/pki/tls/certs/ca.crt

Then set the correct path for the Certificate Key File a few lines below. If you’ve followed the instructions above it is:


SSLCertificateKeyFile /etc/pki/tls/private/ca.key

Quit and save the file and then restart Apache


/etc/init.d/httpd restart

All being well you should now be able to connect over https to your server and see a default Centos page. As the certificate is self signed browsers will generally ask you whether you want to accept the certificate.

3. Setting up the virtual hosts

Just as you set VirtualHosts for http on port 80 so you do for https on port 443. A typical VirtualHost for a site on port 80 looks like this


<VirtualHost *:80>
        <Directory /var/www/vhosts/yoursite.com/httpdocs>
        AllowOverride All
        </Directory>
        DocumentRoot /var/www/vhosts/yoursite.com/httpdocs
        ServerName yoursite.com
</VirtualHost>

To add a sister site on port 443 you need to add the following at the top of your file

NameVirtualHost *:443
and then a VirtualHost record something like this:


NameVirtualHost *:443
<VirtualHost *:443>
        SSLEngine on
        SSLCertificateFile /etc/pki/tls/certs/ca.crt
        SSLCertificateKeyFile /etc/pki/tls/private/ca.key
        <Directory /var/www/vhosts/yoursite.com/httpsdocs>
        AllowOverride All
        </Directory>
        DocumentRoot /var/www/vhosts/yoursite.com/httpsdocs
        ServerName yoursite.com
</VirtualHost>

Restart Apache again using


# /etc/init.d/httpd restart

4. Configuring the firewall

You should now have a site working over https using a self-signed certificate. If you can’t connect you may need to open the port on your firewall. To do this amend your iptables rules:


iptables -A INPUT -p tcp --dport 443 -j ACCEPT
/sbin/service iptables save
iptables -L -v

Other resources: http://www.rackspace.com/knowledge_center/article/centos-apache-virtual-hosts#NameVirtualHosts

HTTP Strict Transport Security (HSTS) is an opt-in browser security mechanism that lets web site owners declare “Encrypted Communications Only”.

Strict-Transport-Security HTTP header instructs browsers to only communicate with the domain over SSL/TLS for a set period of time (the max-age). HSTS only goes into effect after a browser receives a valid header from the domain. HSTS is to ensure unencrypted communication is not allowed on your domain or site to mitigate attacks such as SSL-stripping.

The HSTS Header


Strict-Transport-Security: max-age:31536000; includeSubDomains 

The max-age parameter value is in seconds; 31536000 seconds equals 365 days. Notice how the above also uses includeSubDomains. This optional parameter informs the browser to force secure communication to the site’s subdomains as well.

Browsers must receive the Strict-Transport-Security header over an HTTPS connection with the domain; HSTS headers over HTTP are not recognized as valid.

Threat Mitigation
HSTS mitigates the following threats.

1. HTTP request to an HTTPS site
For example:
1. User wants to visit SecureSite.com
2. User types SecureSite.com into the address bar
3. Browser automatically appends “http://” making the following request: http://SecureSite.com
4. Server responds with 301 (permanent redirect) to the following location: https://SecureSite.com
5. Browser makes request to above URL

The above scenario allows for a man-in-the-middle attack as a result of the unintentional HTTP request to SecureSite.com. An attacker can leverage a tool such as ssltrip to transparently hijack the HTTP request prior to the 301 redirect. HSTS eliminates this attack window as long as the user previously accessed SecureSite.com over HTTPS and obtained the HSTS header.

Even with HSTS enabled, a user’s initial request to SecureSite.com would remain unprotected from attacks. As a result, both Chrome and Mozilla introduced HSTS preload lists. If SecureSite.com is on Chrome’s HSTS preload list, a freshly installed Chrome browser will only allow secure connections to that site, even if the user never accessed it before.

2. Insecure link referencing an HSTS enabled site

For example:

1. Forum.com includes a link to http://SecureSite.com
2. HSTS will automatically convert the link to HTTPS for the HSTS-enabled site
3. Invalid Certificate
The following would be considered invalid certificates:
– Self-signed and/or untrusted CA signed certificate
– Expired
– Wrong name specified
– …

HSTS displays an error message as shown below. In addition, it will NOT allow the user to override the error message, thus preventing a potential attack by ensuring the victim does not accept the bad certificate.

Enabling HSTS
You can enable HSTS in Apache with mod headers and the following line in your configuration:


<IfModule mod_headers.c>
# this domain should only be contacted in HTTPS for the next 6 months
Header add Strict-Transport-Security "max-age=15768000"
</IfModule> 

Afterwards, restart Apache and test the configuration change:


# curl -si nvisium.com | grep ^Strict
Strict-Transport-Security: max-age=31536000 

In Nginx, update nginx.conf:


# add_header Strict-Transport-Security "max-age=31536000; includeSubDomains"; 

In Rails, HSTS can be enabled with the following:


# config.force_ssl = true 

HSTS Preload Lists
Chrome
Code repository:
https://src.chromium.org/viewvc/chrome/trunk/src/net/http/transport_security_state_static.json

Add your site using using the following:
https://hstspreload.appspot.com

Firefox
Code repository:
http://dxr.mozilla.org/mozillacentral/source/security/manager/boot/src/nsSTSPreloadList.inc

Firefox does not maintain their own list; instead, they use a subset of Google’s. Firefox only accepts sites on Google’s preload list that have a max-age greater than or equal to 18 weeks (10886400 seconds). See https://blog.mozilla.org/security/2012/11/01/preloading-hsts/ for more information.

Testing HSTS
– Leverage an intercepting proxy (e.g. Burp) or browser tools (e.g. Chrome DevTools / Firefox Developer Tools) to examine server responses

– In Chrome, type the below to determine if a host is in your STS cache
chrome://net-internals/#hsts

– In Firefox, you can use the Strict Transport Security Detector add-on to see if the site supports HSTS (https://addons.mozilla.org/en-US/firefox/addon/strict-transport-security-d/)

Source: http://blog.nvisium.com/2014/04/is-your-site-hsts-enabled.html

What is a multi-domain or UC/SAN SSL certificate?

Multi-domain certificates are SSL certificates that allow you to secure multiple, potentially unrelated domains with a single certificate. This includes UCC/SAN certificates and wildcard certificates. Unified Communications/Subject Alternate Name (UC/SAN) Certificates are SSL certificates that allow you to specify a list of hostnames that the same certificate protects.

Note:

Icon

You must reissue these certificates each time that you add a new hostname.

What is a wildcard SSL certificate?

A wildcard certificate allows you to install the same certificate on any number of subdomains if they share an IP address. You can apply a wildcard certificate to services in WHM’s Manage Service SSL Certificates interface (Home >> Service Configuration >> Manage Service SSL Certificates).

  • For example, if you have a wildcard certificate for 
    *.example.com

    , you can use it to securely connect to 

    mail.example.com

     and

    www.example.com

    , but not to 

    example.com

    .

  • The 
    root

     user may install a wildcard certificate on a collection of subdomains that are associated with a single root domain on multiple IP addresses. If multiple IP addresses are used, a user on the server must not own the 

    root

    domain.

What is the difference between a wildcard and a webserver certificate?

Webserver certificates only allow you to secure a single domain. Wildcard certificates allow you to secure a domain and an unlimited number of subdomains. For example, if you wish to secure 

store.example.com

 and 

blog.example.com

, you can use a single wildcard certificate to do so. However, each subdomain will require its own dedicated IP address.

Dedicated IP Transfer

If you select Dedicated IP for the account while transferring it, it should transfer with a working SSL certificate from cPanel to cPanel transfers. If you do not select Dedicated IP during the account transfer, it will transfer the certificate, but it will not install the SSL due to the dedicated IP missing.

If Transfered with a Shared IP

You should be able to re install the SSL using WHM > SSL/TLS > Install a SSL Certificate and Setup the Domain area by clicking the “Browse” button to find the domain.

If the domain isn’t listed, then that would mean the certificate didn’t get transferred. At that point, then you’d simply have to check /usr/local/apache/conf/httpd.conf on the old machine for the domain’s VirtualHost entry to find the path to the certificate, RSA key and cabundle files (normally, those are in /etc/ssl/certs and /etc/ssl/private locations).

Moving your SSL Certificate to a new host in WHM

Retrieve Data from WHMFind the SSL/TLS section in WHM

  • Click “ssl manager” in WHM
  • Click the disk icon for domain.com.crt (where domain.com is the domain you want to copy)
  • Copy that cert to notepad and save the file (this is the .crt information)
  • Click the disk icon for domain.com.key (where domain.com is the domain you want to copy)
  • Copy that information to notepad and save the file (this is the .key information)

WHM (Web Hosting Manager)

WebHost Manager is the control center of the CPanel / WebHost Manager package. It is used to set up and manage accounts. Use WHM to install your issued certificate.

You need both the certificate and key files to install the certificate.

To install an SSL certificate:

Click on the “Install an SSL Certificate and Setup the Domain link” in the SSL/TLS menu.
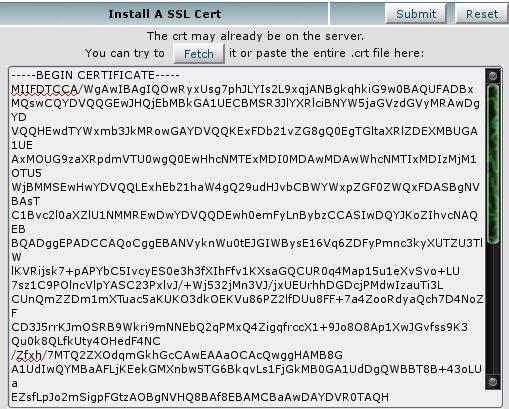
Paste the information from the .crt file in the top box (The .crt file starts with
—–BEGIN CERTIFICATE—–)
Enter the domain that the certificate is issued for, the user name for the users account, and Dedicated IP address assigned for the certificate in the Domain, User, and IP Address fields.
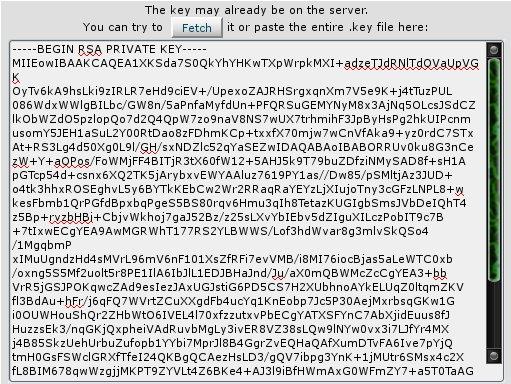
Paste the information from the .key file in the second box (The .key file starts with
—–BEGIN RSA PRIVATE KEY—–)
Check to make sure that the IP address and domain name and username is all correct then
Click on the button to install the certificate.
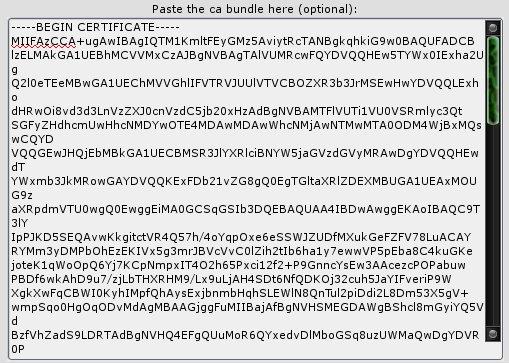
The last section for the “ca bundle” is not required as this is a single certificate install.

1. Login to your WHM
2. Assigned dedicated IP – You will then select the IP Functions icon from the Main Menu.

Then, select ‘Change Site’s IP Address’ icon. You will now see a list of the domains and users on your server. Find the domain you are wishing to install the SSL Certificate on and click the ‘Change’ button at the bottom of the page. You will now be given a drop down list of available IPs for you to assign to your site. Select the IP you want and click the ‘Change’ button and your site’s IP will be changed (Make sure not to set this to ‘main shared IP’).

whm-ssl-domain-ip-user-fields

3. Install the SSL Certificate – Go back to the Main Menu and select the ‘SSL/TLS’ icon.

Then select ‘Install an SSL Certificate on a Domain’ icon. You will then be taken to the ‘Install an SSL Certificate on a Domain’ management page. You will need to fill out all fields in order to install the SSL Certificate.

A. Enter the CSR into the first field.

whm-ssl-csr-field

The SSL Manager will then try to fetch the rest of the fields needed. It should fill in the next three fields as such.

If any of this information isn’t correct then your SSL Certificate isn’t issued properly and you need to contact your SSL issuer for them to assist you with having the SSL Certificate reconfigured.

B. You will now need to insert the RSA key (If one was automatically fetched for you, please replace it with the one we have given you).

whm-ssl-rsa-field

C. You will then need to enter your CA Bundle in the last field (If you do not enter a CA then the SSL Certificate will appear as self-signed and a warning will be shown when customers attempt to access your site securely).

whm-ssl-ca-bundle-field

Once you enter all three needed aspects of the SSL Certificate (CRT, RSA, and CA Bundle) then click the ‘Install’ button. The server will then install the SSL Certificate and notify of completion or if any errors that may have occurred. The new certificate should begin to work immediately and you may view your site using https:// to confirm this.

Newer Panels Versions

Manually enter information

To manually enter all of the information for your certificate:

Enter your domain in the Domain field.

When you enter the complete domain name, the Autofill by Domain option will appear next to the Domain field. If you wish to continue to enter information manually, do not click Autofill by Domain.
If the selected domain is not dedicated to a specific IP address, select an available IP address from the IP Address menu. You can only select an IP address that is labeled as shared oravailable.
In the Certificate field, copy and paste the entire contents of your certificate’s .crt file.
In the Private Key field, copy and paste the entire contents of your certificate’s .key file.
If you chose to install a purchased certificate, you may need to fill in the Certificate Authority Bundle (optional) field. If you do not have the information, contact the organization from which you purchased the certificate.
Click Install.
You can click Reset to remove the information from all fields.
If the installation is successful, WHM will display a message to indicate that the certificate installed. If the installation is unsuccessful, WHM will display an error message to indicate the problem. More information about how to troubleshoot an SSL installation is available.

You can generate the CSR and Private Key in Plesk itself by following the steps listed below, after that is done you will follow the second set of steps to upload the SSL and CA bundle provided to you from your SSL provider.

For Plesk 11.5

How to request a CSR in Plesk
1. Log into your Plesk control panel.
2. Click on “Domains” on the left hand side.
3. Find the domain in the list you wish to generate the CSR for, then click on “Manage Hosting” on the right hand side of the domain.
4. Click on the domain name in big bolded letters ( it should say “Hosting Settings” right next to the place you want to click).
5. Click on “Secure Your Sites”.
6. Click the “Add SSL Certificate” button.
7. Once there, fill out the information for “Certificate Name” (typically this is the name of the domain and the year/month the SSL has been issued, so that it makes it easier to figure out when the SSL will need to be renewed and how long it is good for) and under “Settings” (This would be your company’s information).
8. Once that is all filled out, click the “Request” button, this will generate the CSR and private key for that specific domain.
9. After the CSR is generated it should appear underneath the text boxes that you can use to upload a certificate, you will copy all of this and provide it to the SSL provider.

How to install a SSL Certificate in Plesk.
1. Log into your Plesk control panel.
2. Click on “Domains” on the left hand side.
3. Find the domain in the list you wish to install the SSL for, then click “Manage Hosting” on the right hand side of the domain.
4. Click on your domain name that you are trying to generate the CSR for, it will be in larger bolder letters with “Hosting Settings” right next to it, however you will want to click on the domain name itself.
5. Click on “Secure Your Sites”.
6. Find the SSL in the list that you added to generate the CSR so that you could get the SSL.
7. Once there, either upload the certificate documents that the SSL provider has given you, or if you have the text (which you can get by opening the files provided to you in a text editor) you can copy and paste them into the text boxes. After doing so you would either click “Send Text” or “Send File”.
8. Next you will need to ensure the new SSL is active for the domain, you will go back to click on the domain name in big bolded letters ( it should say “Hosting Settings” right next to the place you want to click), and click the “Hosting Settings” that were next to the domain.
9. On this page towards the middle of it you should see a “Security” section, if the “SSL Support” box is not checked you will need to check here, and then from the certificate dropdown menu you would select the new SSL that you uploaded and then select “OK” at the bottom of the page.

For Plesk Onyx:

Or follow these plesk articles:
What you would want to do is first generate a CSR in Plesk and provide that to your SSL provider. To do that you would follow this article first:
https://support.plesk.com/hc/en-us/articles/213939845-How-to-generate-certificate-signing-request-CSR-for-a-domain-in-Plesk

Then they would give you the SSL to install on the server. For that you follow this article:
https://support.plesk.com/hc/en-us/articles/213946825-How-to-install-SSL-certificate-for-a-domain-in-Plesk

Verisign SSL Certificates

You have generated a certificate request (CSR and private key) using plesk. You would like to know how to complete the certificate request process. The Verisign digital certificate can be downloaded in the X.509 format as three files. The three files are designated as:

1) End Entity Certificate

2) First Intermediate Certificate

3) Second Intermediate Certificate

When the Plesk CSR function is submitted, it prompts for only two values:

1) Certificate

2) CA certificate

How are these values determined since there are 3 files returned, but Plesk prompts for 2 values?

1) indicate which Verisign file is mapped to the Certificate field.

2) indicate which Verisign file is mapped to the CA certificate field.

Answer:

The End Entity Certificate is your SSL created to match your public key. The contents of the entity certificate should be placed into the Certificate field of Plesk.

The contents of both the First Intermediate and Second Intermediate will need to be placed into Plesk’s CA Certificate field. These should be pasted in order to create a two part chain certificate.

You should be able to open all of these in the notepad or wordpad programs to view the plain text contents of each certifcate. This will facilitate copy/pasting of the content into Plesk for all certificate fields.

CSRs can actually be generated within Plesk by following the steps I have listed below. I have also included the steps on how to install your SSL after getting it from the SSL provider. Please feel free to let us know if you are in need of anything else or have any further questions.

How to request a CSR in Plesk
1. Log into your Plesk control panel.
2. Click on “Domains” on the left hand side.
3. Find the domain in the list you wish to generate the CSR for, then click on “Manage Hosting” on the right hand side of the domain.
4. Click on “Websites & Domains” at the top of the page.
5. Click on your domain name that you are trying to generate the CSR for, it will be in larger bolder letters with “Hosting Settings” right next to it, however you will want to click on the domain name itself.
6. Click on “Secure Your Sites”.
7. Click the “Add SSL Certificate” button.
8. Once there, fill out the information for “Certificate Name” (typically this is the name of the domain and the year/month the SSL has been issued, so that it makes it easier to figure out when the SSL will need to be renewed and how long it is good for.) and under “Settings” (This would be your company’s information).
9. Once that is all filled out, click the “Request” button, this will generate the CSR for that specific domain.
10. After the CSR is generated it should appear underneath the Certificate text boxes, you will copy all of this and provide it to the SSL provider.

How to install a SSL Certificate in Plesk.
1. Log into your Plesk control panel.
2. Click on “Domains” on the left hand side.
3. Find the domain in the list you wish to install the SSL for, then click “Manage Hosting” on the right hand side of the domain.
4. Click on “Websites & Domains” at the top of the page.
5. Click on your domain name that you are trying to generate the CSR for, it will be in larger bolder letters with “Hosting Settings” right next to it, however you will want to click on the domain name itself.
6. Click on “Secure Your Sites”.
7. Find the SSL in the list that you added to generate the CSR so that you could get the SSL.
8. Once there, either upload the certificate documents that the SSL provider has given you, or if you have the text you can copy and paste them into the text boxes. After doing so you would either click “Send Text” or “Send File”.
9. Next you will need to ensure the new SSL is active for the domain, you will go back to “Websites & Domains” tab that you were on previously, and click the “Hosting Settings” that were next to the domain.
10. On this page towards the middle of it you should see a “Security” section, if the “SSL Support” box is not checked you will need to check here, and then from the certificate dropdown menu you would select the new SSL that you uploaded and then select “OK” at the bottom of the page.