When sending from Roundcube on an Ubuntu server with plesk, we get the following error:
SMTP Error (535): Authentication failed

Linux, Windows, Software Tips, Articles and Hacks
When sending from Roundcube on an Ubuntu server with plesk, we get the following error:
SMTP Error (535): Authentication failed
Connect to a Plesk server via SSH.
Create a copy “postfix” configuration file:
# cp -a /etc/postfix/main.cf /root/backup_main.cf
Open “postfix” configuration file in a text editor, for example, “vi” editor:
# vi /etc/postfix/main.cf
Add the lines specified below to the configuration file main.cf and make sure that these lines are present only once in the file:
Note: replace example.com with required mail server name.
myhostname = example.com
smtpd_banner = $myhostname ESMTP $mail_name
Using command line tool. check “postfix” configuration syntax and restart postfix:
postfix check
(empty output - means syntax is OK)
# service postfix restart
FTP is not working and has the following error:
421 Service not available, remote server has closed connection
Also, in the message logs:
Plesk Unable to FTP – missing scoreboard file (Linux)
On CentOS 6 and 7 if you experience issues logging on to FTP server please check the logs for the following:
# tail -f /var/log/messages
Look for this error:
proftpd[11951]: fatal: ScoreboardFile: : unable to use '/var/run/proftpd/scoreboard': No such file or directory on line 74 of '/etc/proftpd.conf'
Check in /var/run for a proftpd folder, if it’s missing you have a bug in your ProFTPd version usually caused by using the Atomic repo to update ProFTPd.
Check for atomic:
# ls -la /etc/yum.repos.d/ | grep atomic
-rw-r--r--.   1 root root   827 May 18  2016 atomic.repo
The solution is to remove the package and reinstall from Plesk repo:
rpm -e --nodeps psa-proftpd
plesk installer --select-release-current --install-component=proftpd
service xinetd restart
Then you should be able to connect again. Please note that any changes to proftpd.conf such as enabling custom PassivePorts will be lost and need to be recreated.
Source: https://community.webcore.cloud/tutorials/plesk_articles/plesk_unable_to_ftp_missing_scoreboard_file_linux/
Symptoms
Webmail webmail.example.com shows the blank page or the default plesk page.
DNS records for webmail.example.com is managed by external DNS server:
# dig +short webmail.example.com @8.8.8.8
203.0.113.2
There is another IP 203.0.113.3 is set in web server configuration file for webmail.example.com:
RHEL-like systems
grep VirtualHost /etc/httpd/conf/plesk.conf.d/webmails/example.com_webmail.conf | grep -v "/VirtualHost"
<VirtualHost 203.0.113.3:7080 127.0.0.1:7080>
<VirtualHost 203.0.113.3:7081 127.0.0.1:7081>
Debian-like systems
grep VirtualHost /etc/apache2/plesk.conf.d/webmails/example.com_webmail.conf | grep -v "/VirtualHost"
<VirtualHost 203.0.113.3:7080 127.0.0.1:7080>
<VirtualHost 203.0.113.3:7081 127.0.0.1:7081>
Both IP addresses belongs to the server
Cause
IP address that is set for domain does not match the one specified on registrar’s side.
Resolution
Log into Plesk
Browse to Home > Domains > example.com > Web Hosting Access and change IP address to the correct one 203.0.113.2
If the domain has no hosting and used only to serve mail, Web Hosting Access link is not present in Plesk. However, to update IP for webmail’s configuration file is possible via command line:
Connect to the server using SSH
Update the IP address to correct one:
# plesk bin subscription -u example.com -ip 203.0.113.2
Source: https://support.plesk.com/hc/en-us/articles/115005104213-Webmail-shows-the-blank-page
How to enable and test CORS on Plesk
https://stackoverflow.com/questions/12173990/how-can-you-debug-a-cors-request-with-curl
https://support.plesk.com/hc/en-us/articles/115001338265-How-to-set-up-CORS-cross-origin-resource-sharing-in-Plesk-for-Linux-
and
https://awesometoast.com/cors/
The Plesk Control Panel has the ability to create multiple MySQL and PostgreSQL databases as well as multiple users within each database. Also, directly accessible via Plesk, are the links to phpMyAdmin and PhpPGAdmin, the PHP interface applications that abstract mysql or postgresql into a web-based administration tool, allowing you to sort, edit, and create tables within a given database.
Before creating your databases within the Plesk Control Panel, please ensure that you have already added a hosted domain name to your dedicated server.
Here is how you can create MySQL (or PostgreSQL) databases using Plesk:
Login to your Plesk Control Panel. The login URL is in the following format (https://ipaddress:8443).
Click on Websites and Domains from the navigation bar on the left.

Select the domain name that you’d like to associate your database with.
Click the Databases icon on the top right menu.
![]()
Click the Add Database icon.
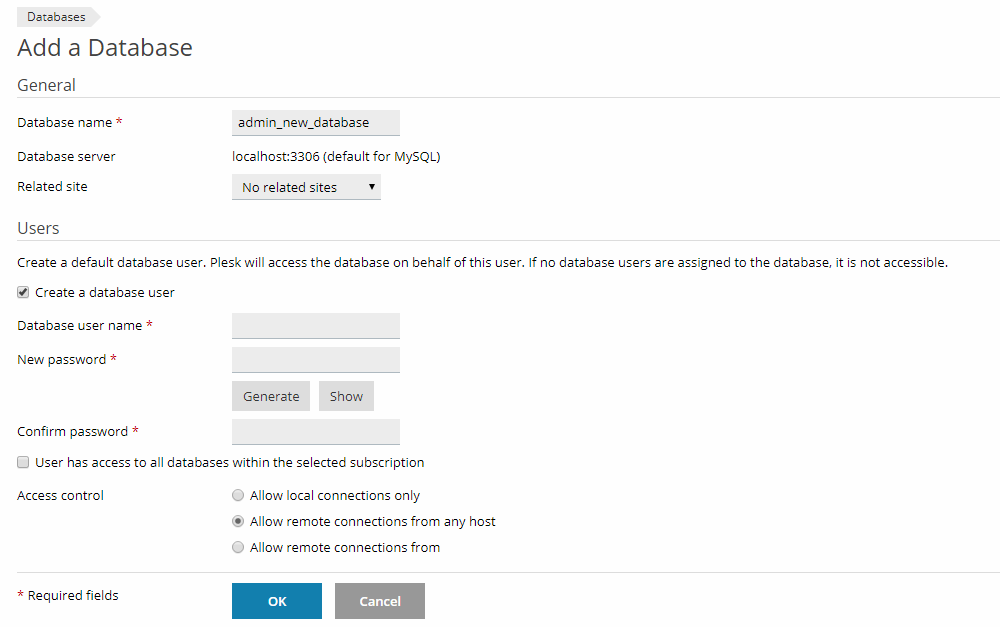
Add the Database Name
Select the related site for the data base.
Click the “Create a Database User” box in order to setup database administrator’s credentials.
Enter a username and a password which will be used for accessing the contents of the database.
Select if the User has access to all databases.
Select Access Control for the database.
Click OK.
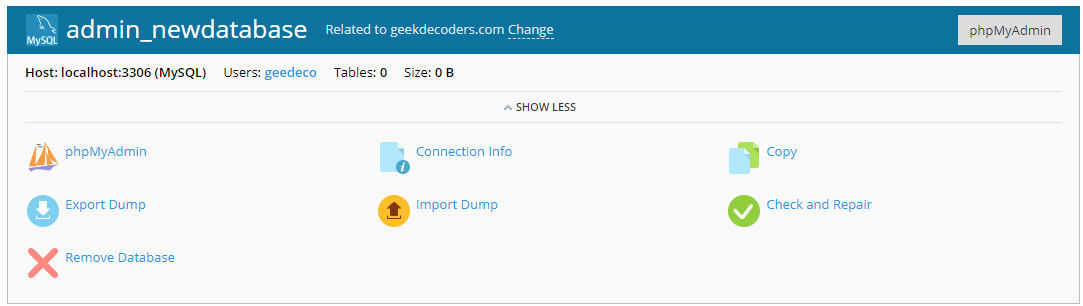
Now, you can use the phpMyAdmin and other tools where you can manage your database.
I went and adjusted the expected time out to 4 hours on every domain and on the default settings through Plesk. But it seems that instead of time outs being handled by php, the server runs a cron job that handles the timeouts and ignore php settings. That breaks our apps. Is it there a way to change his?
See: https://websavers.ca/plesk-php-sessions-timing-earlier-expected
After switching a WordPress website to FPM served by nginx in Plesk, it fails to load with “404 Not Found” on all pages except start page.
See: https://support.plesk.com/hc/en-us/articles/213912945-A-WordPress-website-on-a-Plesk-server-shows-404-Not-Found-on-all-pages-except-index-php-when-running-on-FPM-by-nginx
For one website
In Plesk, add the content below to the Additional nginx directives field of the WordPress domain at Domains > example.com > Apache & nginx Settings:
    if (!-e $request_filename) {
    set $test P;
    }
    if ($uri !~ ^/(plesk-stat|webstat|webstat-ssl|ftpstat|anon_ftpstat|awstats-icon|internal-nginx-static-location)) {
    set $test "${test}C";
    }
    if ($test = PC) {
    rewrite ^/(.*)$ /index.php?$1;
    }
Need to replace the IP’s for plesk domains to a single IP? Here’s how:
https://docs.plesk.com/en-US/onyx/advanced-administration-guide-linux/65871/