[stextbox id=”warning”]Connection reset by peer: mod_fcgid: error reading data from FastCGI server[/stextbox]

Connection reset by peer: mod_fcgid: error reading data from FastCGI server
[Thu Jul 31 13:05:21 2014] [error] [client 99.xxx.xx.xx] Premature end of script headers: cron.php

Edit fastcgi.conf and add the following:

nano /etc/nginx/fastcgi.conf
FcgidBusyTimeout 3600

PHP Spam Scripts

I finally decided this topic deserves its own page.
To find the script sending spam
Plesk

Ver -11.0


cat /var/www/vhosts/domain.com/statistics/logs/access_log | grep POST > /tmp/post.log

Ver 11.5+


cat /var/www/vhosts/system/domain.com/statistics/logs/access_log | grep POST > /tmp/post.log

WHM cPanel


cat /usr/local/apache/domlogs/domain.com | grep POST > /tmp/post.log

View the results


cat /etm/post.log

78.138.118.128 - - [02/Jan/2014:10:51:41 -0500] "POST /tmp/sys09725841.php HTTP/1.1" 200 181 "-" "-"
78.138.118.128 - - [02/Jan/2014:10:52:54 -0500] "POST /tmp/sys09725841.php HTTP/1.1" 200 181 "-" "-"
78.138.118.128 - - [02/Jan/2014:10:54:13 -0500] "POST /tmp/sys09725841.php HTTP/1.1" 200 181 "-" "-"
78.138.118.128 - - [02/Jan/2014:10:55:18 -0500] "POST /tmp/sys09725841.php HTTP/1.1" 200 181 "-" "-"
78.138.118.128 - - [02/Jan/2014:10:56:32 -0500] "POST /tmp/sys09725841.php HTTP/1.1" 200 181 "-" "-"

Joomla

This file often appears in /tmp/sysNNNNNNNN.php file
1. /tmp is 777
2. the sysNNNNNNNN.php is usually accompanied by a .zip file
3. .php and .zip are owned by apache


> logfile

or


cat /dev/null > logfile

if you want to be more eloquent, will empty logfile (actually they will truncate it to zero size).

You can also use


truncate logfile --size 0

to be perfectly explicit or, if you don’t want to,


rm logfile

(applications usually do recreate a logfile if it doesn’t exist already).

However, since logfiles are usually useful, you might want to compress and save a copy. While you could do that with your own script, it is a good idea to at least try using an existing working solution, in this case logrotate, which can do exactly that and is reasonably configurable.

[stextbox id=”warning”]Error: SSL read: error:00000000:lib(0):func(0):reason(0), errno 104[/stextbox]

Getting a curl error from a php script. Try to run curl without php.

ssh to the server
find the script

cd /var/www/vhosts/path/to/script
nano script.php

Find the call and execute from a command line

curl --verbose https://api-internal.script.com

Output:

* About to connect() to api-internal.script.com port 443
* Trying 54.183.xxx.xxx... Connection refused
* couldn't connect to host
* Closing connection #0
curl: (7) couldn't connect to host
[1] 418
[2] 419
[3] 420
[1] Done entityType=destination?searchDate=2014-08-31
[2]- Done partySize=4
[3]+ Done searchTime=12%3A00

It looks like the connection is being refused by the remote server. Curl the page directly which takes PHP out of the equation. This is the response you get when getting the URL directly from SSH.

When you are using MySQL, you will (likely) have tables that can be fragmented. In MySQL terms this is called “OPTIMIZE”.

You could simply OPTIMIZE every table in every database, but during an OPTIMIZE, the tables are locked, so writing is not possible.

To minimize the time that MySQL will be locked (and results cannot be written), here is a script that checks fragmentation of every table of every database. Only if a table is fragmented, the table is OPTIMIZED.

#!/bin/sh

echo -n "MySQL username: " ; read username
echo -n "MySQL password: " ; stty -echo ; read password ; stty echo ; echo

mysql -u $username -p"$password" -NBe "SHOW DATABASES;" | grep -v 'lost+found' | while read database ; do
mysql -u $username -p"$password" -NBe "SHOW TABLE STATUS;" $database | while read name engine version rowformat rows avgrowlength datalength maxdatalength indexlength datafree autoincrement createtime updatetime checktime collation checksum createoptions comment ; do
  if [ "$datafree" -gt 0 ] ; then
   fragmentation=$(($datafree * 100 / $datalength))
   echo "$database.$name is $fragmentation% fragmented."
   mysql -u "$username" -p"$password" -NBe "OPTIMIZE TABLE $name;" "$database"
  fi
done
done

Another one:

#!/bin/sh

# --- Variabls
MYSQLROOTUSR='root'
MYSQLROOTPW='password'
PERCENT='55'
ROWCOUNT='300'

mysql -u $MYSQLROOTUSR -p"$MYSQLROOTPW" -NBe "SELECT TABLE_SCHEMA, TABLE_NAME, TABLE_ROWS, DATA_LENGTH, INDEX_LENGTH, DATA_FREE, (DATA_FREE*100/DATA_LENGTH) as PRC FROM INFORMATION_SCHEMA.TABLES WHERE (DATA_FREE*100/DATA_LENGTH) >= $PERCENT AND TABLE_ROWS >= $ROWCOUNT ORDER BY TABLE_SCHEMA, PRC DESC;" | while read TABLE_SCHEMA TABLE_NAME TABLE_ROWS DATA_LENGTH INDEX_LENGTH DATA_FREE PRC; do

        echo "$TABLE_SCHEMA.$TABLE_NAME is $PRC% fragmented and has $TABLE_ROWS rows."
        mysql -u "$MYSQLROOTUSR" -p"$MYSQLROOTPW" -NBe "OPTIMIZE TABLE $TABLE_NAME;" "$TABLE_SCHEMA"
done

Another tool of a similar nature is the MySQLReport tool which can be found at http://hackmysql.com.

Information can be found here about how to read and analyse the report that is produces from this link http://hackmysql.com/mysqlreportguide.

You can load it up remotely and build it on your server in a similar way making use of an HTTP tool like CURL or WGET etc:

wget hackmysql.com/scripts/mysqlreport

–2011-11-13 02:58:47– http://hackmysql.com/scripts/mysqlreport
Resolving hackmysql.com… 64.13.232.157
Connecting to hackmysql.com|64.13.232.157|:80… connected.
HTTP request sent, awaiting response… 200 OK
Length: 38873 (38K) [application/x-perl]
Saving to: `mysqlreport’

100%[======================================>] 38,873 –.-K/s in 0.1s

2011-11-13 02:58:47 (254 KB/s) – `mysqlreport’ saved [38873/38873]

Once loaded give the newly installed file execute permission with the following command

chmod +x mysqlreport1.pl

You then call it by passing through the details of the system you want to analyse e.g:


mysqlreport --user root --host localhost --password mypsw100

Download/Installation
Simple

wget https://raw.githubusercontent.com/major/MySQLTuner-perl/master/mysqltuner.pl
# chmod +x mysqltuner.pl
# ./mysqltuner.pl

You can download the entire repository by using ‘git clone’ followed by the cloning URL above. The simplest and shortest method is:

wget mysqltuner.pl
perl mysqltuner.pl

Change the permissions you can execute it without calling perl directly.

[root@austin ~]# chmod +x mysqltuner.pl

[root@austin ~]# ./mysqltuner.pl

 >>  MySQLTuner 1.2.0 - Major Hayden <major@mhtx.net>
 >>  Bug reports, feature requests, and downloads at http://mysqltuner.com/
 >>  Run with '--help' for additional options and output filtering

-------- General Statistics --------------------------------------------------
[--] Skipped version check for MySQLTuner script
[OK] Currently running supported MySQL version 5.1.73-log
[OK] Operating on 64-bit architecture

-------- Storage Engine Statistics -------------------------------------------
[--] Status: -Archive -BDB -Federated +InnoDB -ISAM -NDBCluster
[--] Data in MyISAM tables: 4M (Tables: 230)
[--] Data in InnoDB tables: 12M (Tables: 419)
[--] Data in MEMORY tables: 0B (Tables: 2)
[!!] Total fragmented tables: 423

-------- Security Recommendations  -------------------------------------------
[OK] All database users have passwords assigned

-------- Performance Metrics -------------------------------------------------
[--] Up for: 16s (25 q [1.562 qps], 8 conn, TX: 62K, RX: 1K)
[--] Reads / Writes: 93% / 7%
[--] Total buffers: 58.0M global + 1.6M per thread (151 max threads)
[OK] Maximum possible memory usage: 303.4M (3% of installed RAM)
[OK] Slow queries: 0% (0/25)
[OK] Highest usage of available connections: 0% (1/151)
[OK] Key buffer size / total MyISAM indexes: 16.0M/1.1M
[!!] Key buffer hit rate: 77.6% (98 cached / 22 reads)
[!!] Query cache is disabled
[OK] Sorts requiring temporary tables: 0% (0 temp sorts / 2 sorts)
[OK] Temporary tables created on disk: 20% (1 on disk / 5 total)
[!!] Thread cache is disabled
[OK] Table cache hit rate: 68% (15 open / 22 opened)
[OK] Open file limit used: 3% (32/1K)
[OK] Table locks acquired immediately: 100% (29 immediate / 29 locks)
[!!] Connections aborted: 25%
[OK] InnoDB data size / buffer pool: 12.1M/16.0M

[stextbox id=”warning”]——– Recommendations —————————————————–[/stextbox]

General recommendations:
Run OPTIMIZE TABLE to defragment tables for better performance
MySQL started within last 24 hours – recommendations may be inaccurate
Enable the slow query log to troubleshoot bad queries
Set thread_cache_size to 4 as a starting value
Your applications are not closing MySQL connections properly
Variables to adjust:
query_cache_size (>= 8M)
thread_cache_size (start at 4)


Optimize tables

See – http://geekdecoder.com/mysql-checkrepair-database/

Enable the slow query log to troubleshoot bad queries
Set thread_cache_size to 4 as a starting value
query_cache_size (>= 8M)
thread_cache_size (start at 4)


[root@austin ~]# nano /etc/my.cnf

[mysqld]
port            = 3306
socket          = /var/lib/mysql/mysql.sock
skip-locking
key_buffer_size = 16M
max_allowed_packet = 1M
table_open_cache = 64
sort_buffer_size = 512K
net_buffer_length = 8K
read_buffer_size = 256K
read_rnd_buffer_size = 512K
myisam_sort_buffer_size = 8M
interactive_timeout=1800
wait_timeout=1800

Add the following if mysql is 5.6.1 or higher

slow_query_log = 1;
slow_query_log_file = '/var/log/mysql-slow.log';
query_cache_type = 1
query_cache_size = 32M
thread_cache_size = 4

Other links and Info:

I would recommend making sure the following is optimized.

Your mysql queries in your code to make sure the queries are being closed.
Your mysql tables are optimized.
Your mysql configuration is optimized for your web site needs.

Here are some helpful links on mysql optimization.

http://www.codero.com/knowledge-base/questions/319/How+to+install+mytop+for+database+performance+monitoring%3A
http://www.codero.com/knowledge-base/questions/298/How+can+I+view+currently+running+MySQL+queries%3F
http://www.codero.com/knowledge-base/questions/274/How+to+check+and+repair+MySQL+database+tables
http://www.codero.com/knowledge-base/questions/96/How+do+I+optimze+mysql%3F
http://www.codero.com/knowledge-base/questions/195/How+can+I+trouble+shoot+my+MySQL+database%3F
http://dev.mysql.com/doc/refman/5.0/en/optimization.html

Check a Specific Table in a Database

If your application gives an error message saying that a specific table is corrupted, execute the mysqlcheck command to check that one table.

The following are some of the key options that you can use along with mysqlcheck.

  • -A, –all-databases Consider all the databases
  • -a, –analyze Analyze tables
  • -1, –all-in-1 Use one query per database with tables listed in a comma separated way
  • –auto-repair Repair the table automatically it if is corrupted
  • -c, –check Check table errors
  • -C, –check-only-changed Check tables that are changed since last check
  • -g, –check-upgrade Check for version dependent changes in the tables
  • -B, –databases Check more than one databases
  • -F, –fast Check tables that are not closed properly
  • –fix-db-names Fix DB names
  • –fix-table-names Fix table names
  • -f, –force Continue even when there is an error
  • -e, –extended Perform extended check on a table. This will take a long time to execute.
  • -m, –medium-check Faster than extended check option, but does most checks
  • -o, –optimize Optimize tables
  • -q, –quick Faster than medium check option
  • -r, –repair Fix the table corruption

-c check
-o optimize
-r reapir
-a analyze

Login to mysql on Plesk

[root@austin ~]# mysql -uadmin -p`cat /etc/psa/.psa.shadow`

Check a single table in a database on linux server without plesk

[root@austin ~]# mysqlcheck -c database_name table -u root -p

[stextbox id=”alert” defcaption=”true” mode=”css”]For Plesk[/stextbox]

For repairing a single table

[root@austin ~]# mysqlcheck -r database_name table_name -uadmin -p`cat /etc/psa/.psa.shadow`

Here is the command to run to repair all tables in a database.

[root@austin ~]# mysqlcheck -r database_name -uadmin -p`cat /etc/psa/.psa.shadow`

Here is the command to run for all databases and tables

[root@austin ~]# mysqlcheck --all-databases -u admin -p`cat /etc/psa/.psa.shadow` --auto-repair

For cPanel

# mysqlcheck --all-databases -r #repair
# mysqlcheck --all-databases -a #analyze
# mysqlcheck --all-databases -o #optimize 

Simple:


# mysql -u username -p databasename
# password: ********
mysql> check table tablename;
mysql> repair table tablename;

cPanel

In cPanel, you can repair a database table by:

cPanel -> Databases -> MySQL Databases

You may need to go to Page 2, so under Current Databases [2] or >> to go to the next page. Under Modify Databases click [Check DB] or [Repair DB].

Plesk

Open the database in phpMyAdmin. To do that, go to your Plesk control panel, click “Websites and Domains,” click “Databases,” and then click the database in question. From there, click “Webadmin” under “Tools.” You will most likely be presented with phpMyAdmin.

Next, click “Databases” in the upper right, click the database name, then scroll all the way down and click “Check All” to check all the tables. From the drop down menu, select “Check Tables” and your tables will immediately be checked. After that, you can decide which tables to select and choose “repair” from the drop down menu

1. Login to your WHM
2. Assigned dedicated IP – You will then select the IP Functions icon from the Main Menu.

Then, select ‘Change Site’s IP Address’ icon. You will now see a list of the domains and users on your server. Find the domain you are wishing to install the SSL Certificate on and click the ‘Change’ button at the bottom of the page. You will now be given a drop down list of available IPs for you to assign to your site. Select the IP you want and click the ‘Change’ button and your site’s IP will be changed (Make sure not to set this to ‘main shared IP’).

whm-ssl-domain-ip-user-fields

3. Install the SSL Certificate – Go back to the Main Menu and select the ‘SSL/TLS’ icon.

Then select ‘Install an SSL Certificate on a Domain’ icon. You will then be taken to the ‘Install an SSL Certificate on a Domain’ management page. You will need to fill out all fields in order to install the SSL Certificate.

A. Enter the CSR into the first field.

whm-ssl-csr-field

The SSL Manager will then try to fetch the rest of the fields needed. It should fill in the next three fields as such.

If any of this information isn’t correct then your SSL Certificate isn’t issued properly and you need to contact your SSL issuer for them to assist you with having the SSL Certificate reconfigured.

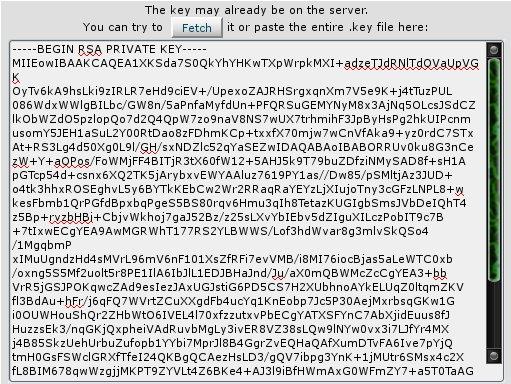
B. You will now need to insert the RSA key (If one was automatically fetched for you, please replace it with the one we have given you).

whm-ssl-rsa-field

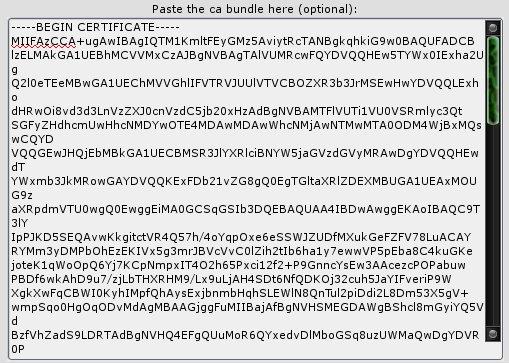
C. You will then need to enter your CA Bundle in the last field (If you do not enter a CA then the SSL Certificate will appear as self-signed and a warning will be shown when customers attempt to access your site securely).

whm-ssl-ca-bundle-field

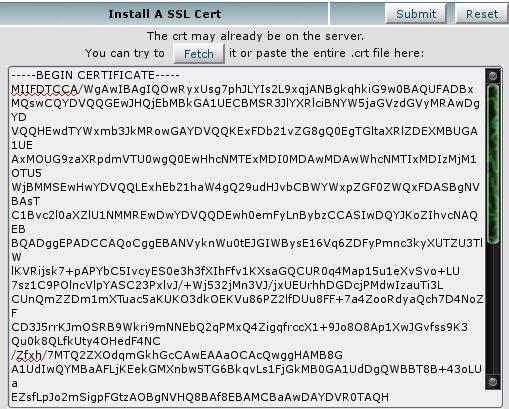
Once you enter all three needed aspects of the SSL Certificate (CRT, RSA, and CA Bundle) then click the ‘Install’ button. The server will then install the SSL Certificate and notify of completion or if any errors that may have occurred. The new certificate should begin to work immediately and you may view your site using https:// to confirm this.

Newer Panels Versions

Manually enter information

To manually enter all of the information for your certificate:

Enter your domain in the Domain field.

When you enter the complete domain name, the Autofill by Domain option will appear next to the Domain field. If you wish to continue to enter information manually, do not click Autofill by Domain.
If the selected domain is not dedicated to a specific IP address, select an available IP address from the IP Address menu. You can only select an IP address that is labeled as shared oravailable.
In the Certificate field, copy and paste the entire contents of your certificate’s .crt file.
In the Private Key field, copy and paste the entire contents of your certificate’s .key file.
If you chose to install a purchased certificate, you may need to fill in the Certificate Authority Bundle (optional) field. If you do not have the information, contact the organization from which you purchased the certificate.
Click Install.
You can click Reset to remove the information from all fields.
If the installation is successful, WHM will display a message to indicate that the certificate installed. If the installation is unsuccessful, WHM will display an error message to indicate the problem. More information about how to troubleshoot an SSL installation is available.