Download to C:\Esxibuild
VMware vSphere Hypervisor (ESXi) 6.7U3b Bundle (not the ISO).
https://my.vmware.com/web/vmware/details?downloadGroup=ESXI67U3B&productId=742
Download the Realtek Drivers:
https://vibsdepot.v-front.de/wiki/index.php/List_of_currently_available_ESXi_packages
(For this one, I used the net55-r8168-8.045a-napi-offline_bundle)
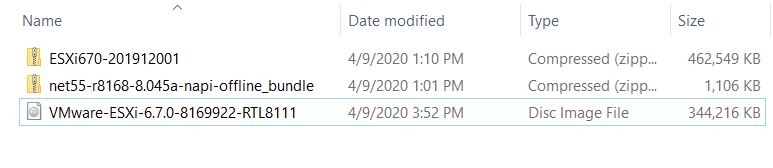
Here is what the files look like:
Download and install the VMware PowerCLI
https://my.vmware.com/group/vmware/details?productId=614&downloadGroup=PCLI650R1
Open powershell. Got to the folder C:\Esxibuild in PS.
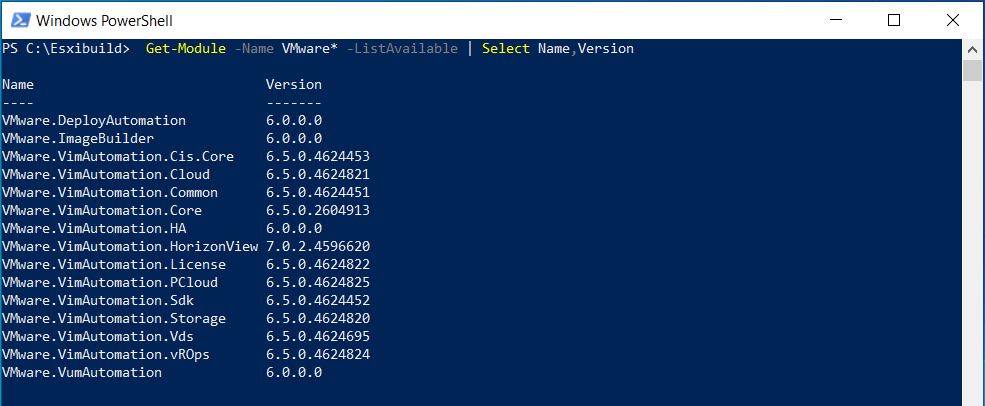
Add the VMware Modules for Powershell:
Get-Module -ListAvailable VM* | Import-Module
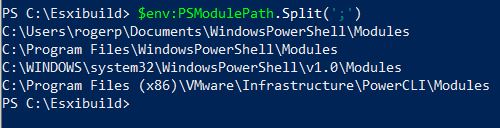
Check Modules:
$env:PSModulePath.Split(‘;’)
Import Modules:
Get-Module -ListAvailable VM* | Import-Module
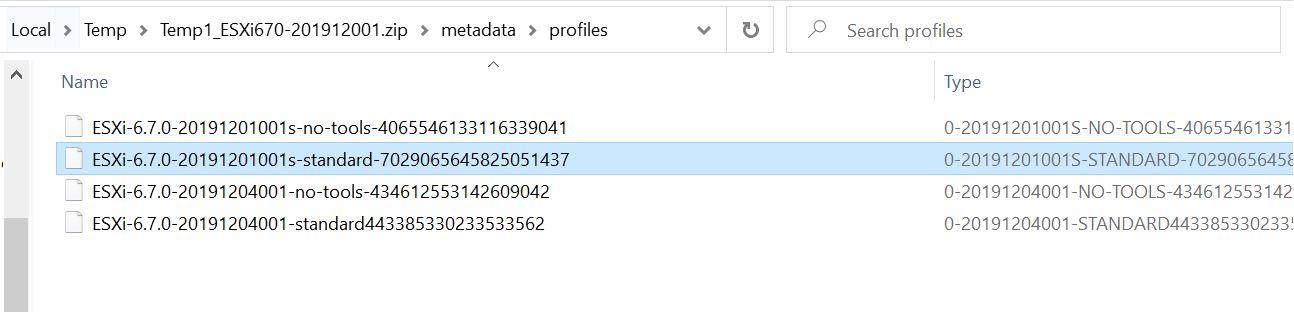
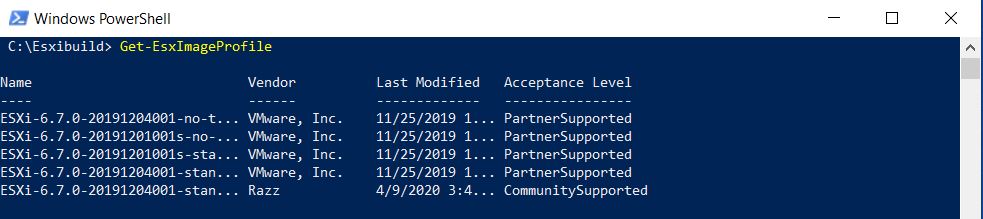
Find the build information. Open the compressed file for the Esxi bundle you downloaded: c:\esxibuild > ESXi670-201912001 > metadata > profiles. There should be 4 profiles. Copy the path for the next commands.
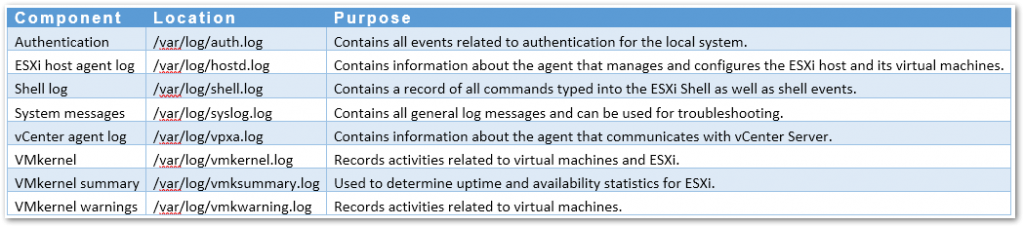
/var/log/auth.log – All events related to authentication for the system.
In addition to the above, every Virtual Machine hosted on ESXi will have corresponding VM log files called vmware.log recording events related to machine activity, system failures, hardware changes, migrations, status and so on. To view the log file, SSH to the ESXi host and navigate to the datastore on which the VM folder resides.
The path to the log file should be similar to /vmfs/volumes///vwmare.log.
There are some adjustments you can make to the log rotation and logging options for a VM. Disable or enable logging: Set the logging value in the VM’s VMX file to false or true respectively. You can do this by editing the VM’s settings (VM Options -> Advanced -> Edit Configuration) in vSphere Web client as shown.
Installing VMware tools in CentOS involves the following steps:
Install the opem-vm-tools:
yum install open-vm-tools
Output:
================================================================================================================================================
 Package                             Arch                       Version                                       Repository                   Size
================================================================================================================================================
Installing:
 open-vm-tools                       x86_64                     10.1.5-3.el7                                  base                        663 k
Installing for dependencies:
 fuse                                x86_64                     2.9.2-8.el7                                   base                         85 k
 fuse-libs                           x86_64                     2.9.2-8.el7                                   base                         93 k
 libdnet                             x86_64                     1.12-13.1.el7                                 base                         31 k
 libicu                              x86_64                     50.1.2-15.el7                                 base                        6.9 M
 libmspack                           x86_64                     0.5-0.5.alpha.el7                             base                         64 k
 net-tools                           x86_64                     2.0-0.22.20131004git.el7                      base                        305 k
 pciutils                            x86_64                     3.5.1-2.el7                                   base                         93 k
 xmlsec1                             x86_64                     1.2.20-7.el7_4                                updates                     177 k
 xmlsec1-openssl                     x86_64                     1.2.20-7.el7_4                                updates                      76 k

Transaction Summary
================================================================================================================================================
Install  1 Package (+9 Dependent packages)

Total download size: 8.4 M
Installed size: 29 M
Reboot the server:
shutdown -r now
Install with with the Vmware CD:
Login to ESXi.
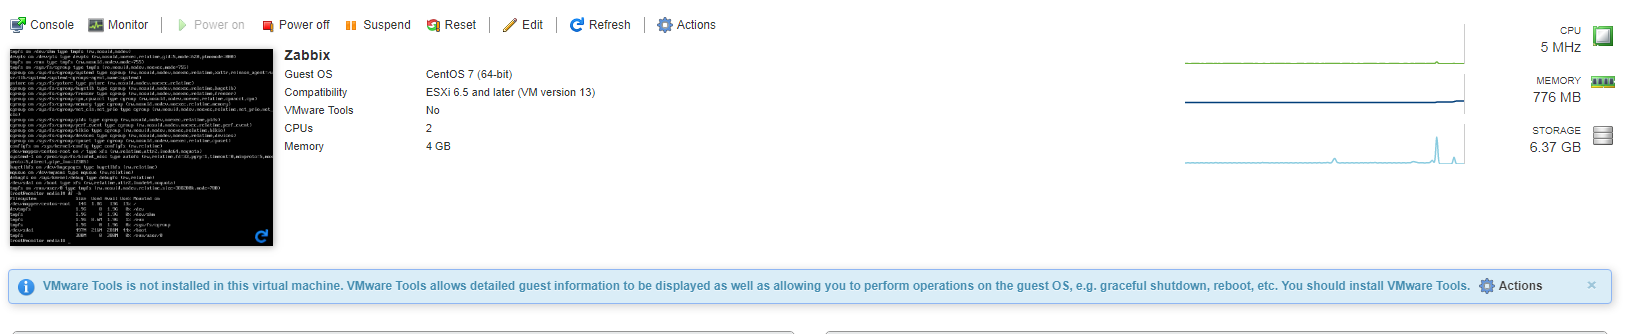
Select the VM from the Virtual Machine list.
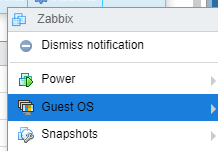
Click the actions wheel for the warning message:
Select Guest OS > Install Vmware Tools
Run the mount command with no arguments to determine whether your Linux distribution automatically mounted the VMware Tools virtual CD-ROM image.
If the CD-ROM device is mounted, the CD-ROM device and its mount point are listed as something like this:
/dev/cdrom on /mnt/cdrom type iso9660 (ro,nosuid,nodev)
If the VMware Tools virtual CD-ROM image is not mounted, mount the CD-ROM drive.
If a mount point directory does not already exist, create it.
mkdir /mnt/cdrom
Some Linux distributions use different mount point names. For example, on some distributions the mount point is /media/VMware Tools rather than /mnt/cdrom. Modify the command to reflect the conventions that your distribution uses.
Mount the CD-ROM drive.
mount /dev/cdrom /mnt/cdrom
Some Linux distributions use different device names or organize the /dev directory differently. If your CD-ROM drive is not /dev/cdrom or if the mount point for a CD-ROM is not /mnt/cdrom, modify the command to reflect the conventions that your distribution uses.
Change to a working directory (for example, /tmp).
cd /tmp
Delete any previous vmware-tools-distrib directory before you install VMware Tools. The location of this directory depends on where you placed it during the previous installation. Often this directory is placed in /tmp/vmware-tools-distrib.
List the contents of the mount point directory and note the filename of the VMware Tools tar installer.
ls /mnt/cdrom/
manifest.txt  run_upgrader.sh  VMwareTools-10.1.0-4449150.tar.gz  vmware-tools-upgrader-32  vmware-tools-upgrader-64
Uncompress the installer.
tar zxpf /mnt/cdrom/VMwareTools-10.1.0-4449150.tar.gz
The value x.x.x is the product version number, and yyyy is the build number of the product release.
If you attempt to install a tar installation over an RPM installation, or the reverse, the installer detects the previous installation and must convert the installer database format before continuing.
If necessary, unmount the CD-ROM image.
umount /dev/cdrom
If your Linux distribution automatically mounted the CD-ROM, you do not need to unmount the image.
Run the installer and configure VMware Tools.
cd vmware-tools-distrib
./vmware-install.pl
open-vm-tools packages are available from the OS vendor and VMware recommends
using open-vm-tools packages. See http://kb.vmware.com/kb/2073803 for more
information.
Usually, the vmware-config-tools.pl configuration file runs after the installer file finishes running. Respond to the prompts by pressing Enter to accept the default values, if appropriate for your configuration. Follow the instructions at the end of the script.
Depending on the features you use, these instructions can include restarting the X session, restarting networking, logging in again, and starting the VMware User process. You can alternatively reboot the guest operating system to accomplish all these tasks.
If you are using vCenter Server, the VMware Tools label on the Summary tab changes to OK.
Tools and utilities is available on ESXi, – busybox executable
~ # /usr/lib/vmware/busybox/bin/busybox --list
[
[[
addgroup
adduser
ash
awk
basename
cat
chgrp
chmod
chown
chvt
cksum
clear
cp
crond
cut
date
dd
delgroup
deluser
diff
dirname
dnsdomainname
du
echo
egrep
eject
env
expr
false
fdisk
fgrep
find
getty
grep
groups
gunzip
gzip
halt
head
hexdump
hostname
inetd
init
kill
ln
logger
login
ls
lzop
lzopcat
md5sum
mkdir
mkfifo
mknod
mktemp
more
mv
nohup
nslookup
od
passwd
poweroff
printf
readlink
reboot
reset
resize
rm
rmdir
sed
seq
setsid
sh
sha1sum
sha256sum
sha512sum
sleep
sort
stat
stty
sum
sync
tail
tar
tee
test
time
timeout
touch
true
uname
uniq
unlzop
unzip
usleep
vi
watch
wc
wget
which
who
xargs
zcat
How to wget from a ISO source:
# cd /vmfs/volumes/datastore_name_here
Load 2012 into the data store
# wget cd http://care.dlservice.microsoft.com/dl/download/6/2/A/62A76ABB-9990-4EFC-A4FE-C7D698DAEB96/9600.17050.WINBLUE_REFRESH.140317-1640_X64FRE_SERVER_EVAL_EN-US-IR3_SSS_X64FREE_EN-US_DV9.ISO
Connect your NAS to your master VM. All other VM’s will connect to the master to backup there. Your VM’s will need to connect to your private network so each VM will need two NIC’s.
The SAN is attached to the hypervisor (ESXi) and then you can add a virtual disk to the machine that is going to act as the backup server.
IE, create a datastore to be able to then allocate the diskspace to the backup server VM: