How to Install Zabbix Agent on Windows 2016 and avoid the: Windows error service could not be started. Error 1053: The service did not respond to the start or control request in a timely fashion.
Download – https://www.zabbix.com/download_agents
If you have the agent service installed incorrectly now, you can remove it by running “zabbix_agentd.exe –uninstall”.
cd c:\zabbix
zabbix_agentd.exe --uninstall
New Install
- Create directory C:\zabbix and place zabbix_agentd.exe and zabbix_agentd.win.conf files there.
- Edit the zabbix_agentd.win.conf file and set the values:
LogFile=C:\zabbix\zabbix_agentd.log
Server = IP address of your Zabbix server
# ListenPort = 10050 Leave it commented as is if you don’t change the defaults
ServerActive = IP of your Zabbix server
Hostname = computer that will be monitored as listed in the zabbix server hosts setup
![]()
3. Open command prompt and execute:
C:\zabbix\zabbix_agentd.exe --config C:\zabbix\zabbix_agentd.win.conf --install
zabbix_agentd.exe [5584]: service [Zabbix Agent] installed successfully
zabbix_agentd.exe [5584]: event source [Zabbix Agent] installed successfully

4. Start Windows service.
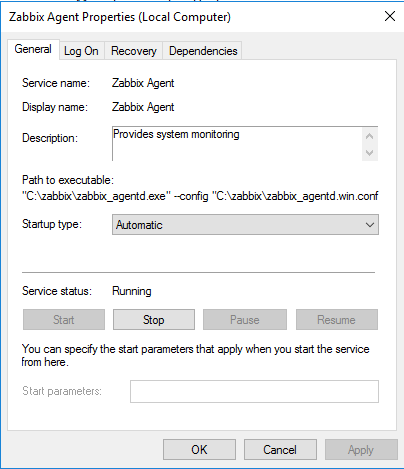
If you receive an error – Windows Agent – Error 1053 – that the service could not be started, run the uninstall above and restart the installation and make sure the files are in the correct directory and the config file changes match what you need.
Please find more info here: https://www.zabbix.com/documentation/4.0/manual/appendix/install/windows_agent
Adding a firewall rule in Windows.
Go to Windows Firewall. Add new rule. Choose port, TCP, Specific Local Ports. Add port 10050.
