netstat -n -p | grep SYN_REC | sort -u

root@server [~]# netstat -n -p | grep SYN_REC | sort -u
tcp 0 0 64.150.187.59:443 223.104.25.3:37928 SYN_RECV -
tcp 0 0 64.150.187.59:443 223.104.25.3:46616 SYN_RECV -
tcp 0 0 64.150.187.59:443 223.104.25.3:50443 SYN_RECV -
tcp 0 0 64.150.187.59:443 223.104.25.3:57853 SYN_RECV -
tcp 0 0 64.150.187.59:443 59.42.206.20:51194 SYN_RECV -
tcp 0 0 64.150.187.59:80 113.13.107.40:20478 SYN_RECV -
tcp 0 0 64.150.187.59:80 114.94.249.36:31196 SYN_RECV -
tcp 0 0 64.150.187.59:80 115.225.79.191:65328 SYN_RECV -
tcp 0 0 64.150.187.59:80 115.52.213.238:63001 SYN_RECV -
tcp 0 0 64.150.187.59:80 116.1.52.150:13610 SYN_RECV -
tcp 0 0 64.150.187.59:80 116.204.102.195:25455 SYN_RECV -
tcp 0 0 64.150.187.59:80 116.252.36.202:8318 SYN_RECV -

More info:
http://www.cisco.com/c/en/us/support/docs/security-vpn/kerberos/13634-newsflash.html
BUSY: Update operation was locked by another update process.
Having trouble updating Plesk? Check for the installer:


ps aux | grep installer

root     31859  0.0  0.2 135560 20820 ?        S    21:10   0:00 /var/cache/parallels_installer/parallels_installer_CentOS_6_x86_64 --service-mode --enable-xml-output --ssl-cert /usr/local/psa/admin/conf/httpsd.pem --branch release,stable --web-interface --with-ssl --disable-browser

Kill the process

kill -9 31859

There’s a psa-installer.lock file in /tmp/ which indicates Plesk a running installer. Be sure no installer is running and then delete this little bugger.


# cd /tmp
# ls
autoinstaller3.log  autoinstaller_webui_socket  phpsqGbDE  phpxQn6nH  psa-installer.lock  spamd_full.sock

CSF Firewall is blocking these attacks in /var/log/messages


Feb 25 02:13:33 servidor kernel: Firewall: *SYNFLOOD Blocked* IN=eth1 OUT= MAC=00:25:90:de:d3:d5:00:19:e8:f4:7a:3f:08:00 SRC=120.43.114.117 DST=64.150.187.59 LEN=52 TOS=0x00 PREC=0x00 TTL=47 ID=21531 DF PROTO=TCP SPT=4760 DPT=80 WINDOW=65535 RES=0x00 SYN URGP=0

Check with

# netstat -alntp | grep SYN | wc -l

You have set the following in your csf configuration but having such a setting, we definitely block SYN connections but legit connections as well.


SYNFLOOD = "1"
SYNFLOOD_RATE = "1/s"
SYNFLOOD_BURST = "3"

With the above settings, you will see a drop down in SYN connections but you won’t be able to browse your websites as well since it blocks legit clients as well.

The proper solution for the heavy attacks is a Hardware Firewall OR CloudFlare.

So if the attack is too heavy, go for any of the above 2 options since re-installation and blocking ports won’t solve the problem.

If you’ve forgotten the sa password for your SQL server, you are probably in a panic. Fear not, for you can change the password and once again have access to the powers of the SA account using Windows Authentication mode.

Login into SQL Server using Windows Authentication.

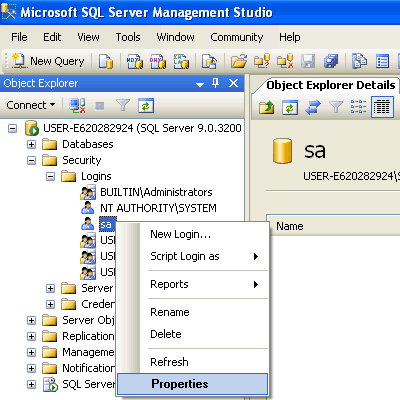
In Object Explorer, open Security folder, open Logins folder. Right click on SA account and go to Properties.

sql-server-management

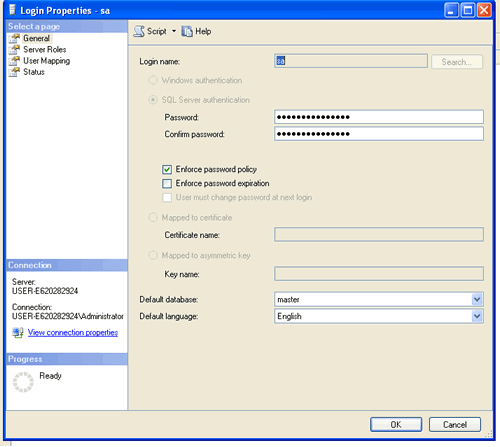
Change SA password, and confirm it. Click OK.

change-sql-server-password

Change SQL Server Password Using SQL Script

Open the SQL Server Management Studio.
Open a New Query.

Copy, paste, and execute the following:


    GO
    ALTER LOGIN [sa] WITH DEFAULT_DATABASE=[master]
    GO
    USE [master]
    GO
    ALTER LOGIN [sa] WITH PASSWORD=N'NewPassword' MUST_CHANGE
    GO

where NewPassword is the password you wish to use for the sa account.

Option 3: Change SQL Server Password with Third Party Software

Download SQL Server Password Changer on your local PC, install and launch it.

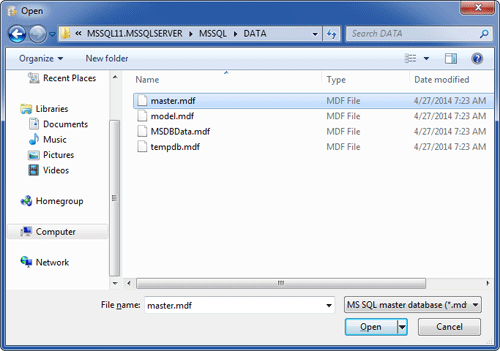
Click the Open File button. Select the SQL Server master database file (master.mdf). Typically it is located in the folder: C:\Program Files\Microsoft SQL Server\MSSQL.1\MSSQL\Data.

open_sqlserver

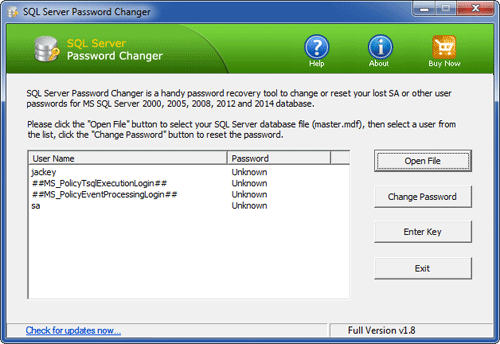
The program will automatically decrypt the master database file and display all user accounts in your SQL Server. Select the SA account, click the Change Password button. Type a new password and click OK.

sqlserver_pwd

The program will replace the existing password with your new password, and also unlock your SA account if it’s already locked out or disabled.

If you are getting such error while uploading a file in the website, then I suggest you to follow the below steps:

Take the backup of the configuration file of the NGINX


# cp /etc/nginx/nginx.conf /etc/nginx/nginx.conf.bkp

Add client_max_body_size 0; (or 100m) to /etc/nginx/nginx.conf and reload nginx proxy server using the below command:


# /etc/init.d/nginx reload

(Note: If ‘client_max_body_size’ entry is not there in the above file, then you can simply insert it under ‘http {‘ section )

If you are getting such error while uploading a file in Plesk Panel (not while uploading in website), I suggest you to follow the below steps:

Increase ‘client_max_body_size’ value accordingly in ‘/etc/sw-cp-server/config’ config file, for e.g. if the file’s size is 4.5GB, you can set the value to 5120m (5120MB).


# grep client_max_body_size /etc/sw-cp-server/config
client_max_body_size 5120m;